Learning by fragments
A fragment is a “piece of a work or text” 1.
It is important to distinguish a fragment from a “motif,” a measure, a “phrase,” or a “period” due to its subjective nature in terms of delimitation. Here, the notion of a fragment refers to a unit (generally comprising 2 to 4 measures) that one chooses freely based on their capacity for concentration.
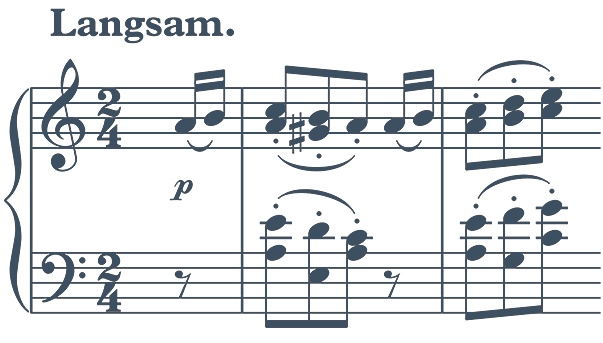
SCHUMANN ⎼ “Armes waisenkind” (Orphan), op.68 no.6, mm. 1-2
Why learn by fragments?
Learning by fragments is recommended for two reasons:
-
Because our memory is limited, it is better to focus on a small number of elements to learn 2
-
In this way, we memorize the form of the piece more precisely, which improves our ability to imagine interactions between its different parts
1 Larousse. (n.d.). Fragment. In Online Dictionary.
2 Cowan N. (2010). The Magical Mystery Four: How is Working Memory Capacity Limited, and Why?. Current Directions in Psychological Science, 19 (1), 51–57. doi.org/10.1177/0963721409359277
→ Switch from one card to another by sliding your finger over the card you see.


-
Description
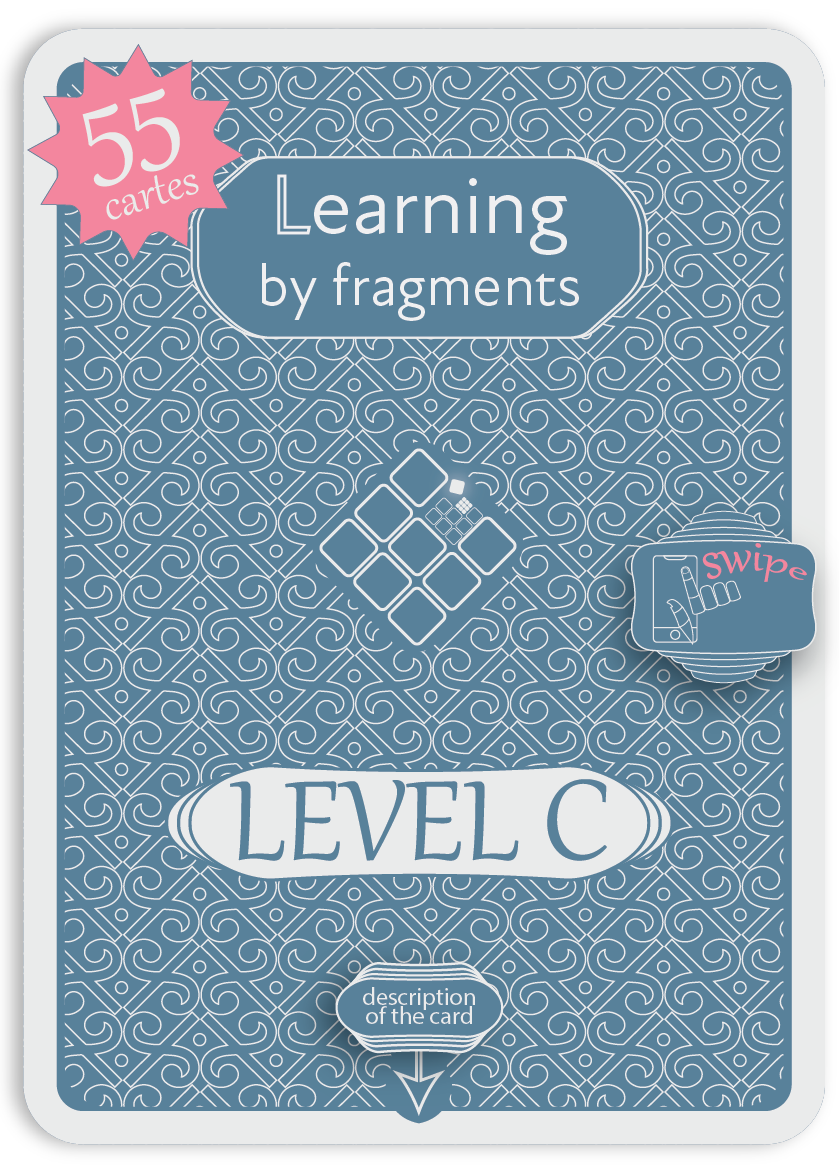
This card series is the most comprehensive. It is designed to help you learn a section of the new piece you are currently working on. Organized into 3 steps (each taking roughly 20 minutes), it includes 54 cards.
We recommend starting by carefully reading the description on each card before attempting the exercise. During your practice, keep the card visible so you can focus on the instructions. Place your smartphone on the music stand and move to the next card once you feel you have completed the previous step by swiping on the screen.
That said, depending on your progress, you are free to spend extra time on a card or skip it. For instance, if marking the pulse bars seems unnecessary, you can skip that card. Likewise, if another card proves challenging, you can move on without getting stuck and continue with the following exercises.
-
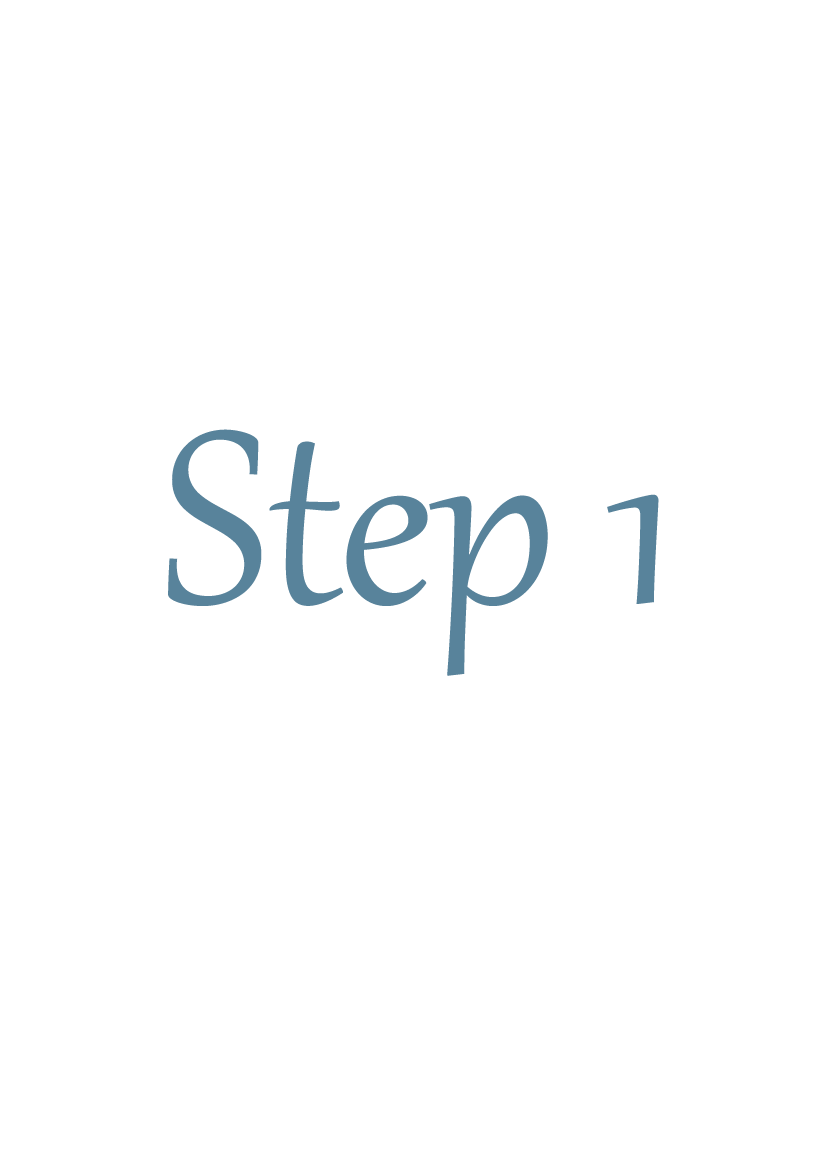
Step I
15 minutes
The first step is a preparatory stage where we approach a fragment of the piece, up to 8 measures, in the manner of a conductor. This preparation is essential for forming a first impression of the piece (or one of its fragments), which we will gradually bring to life in the next two steps.
This stage includes 14 cards:
Setting the conditions
Stretches
Calmness and enthusiasm
Without trying to prove yourself
Choosing a fragment
Writing in the measure numbers
Defining the direction
Noting the keys
Identifying the harmonic rhythm
Defining the “sound image”
Noting the beats
Conducting while humming
Conducting while humming from memory
Writing in the fingerings
-
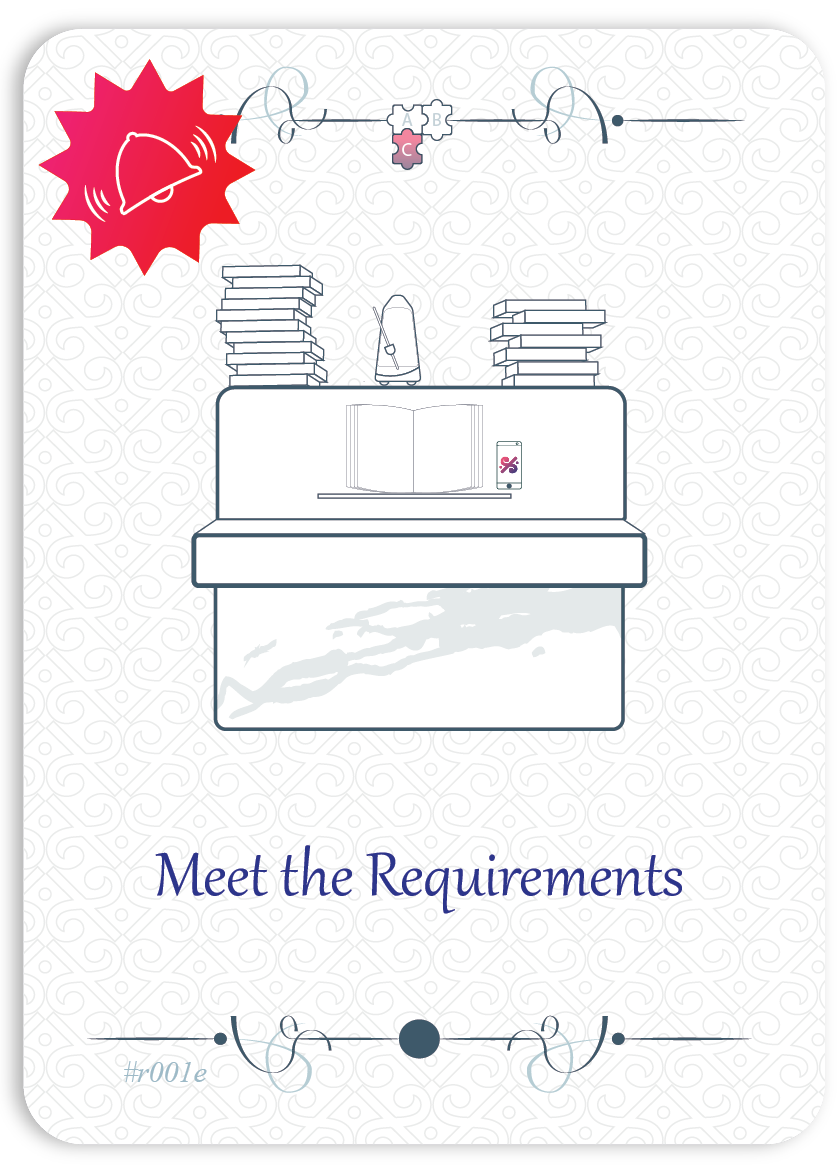
Meet the Requirements
step 1 /3 | card 01 /14 | 01/54
Before starting your practice session, make sure that all conditions for focus are in place.
- Trim your nails
- Put your phone on silent
- Let those around you know you need quiet
- Prepare all the materials you will need – the sheet music (tape the pages if necessary), pencils, metronome, etc.
-
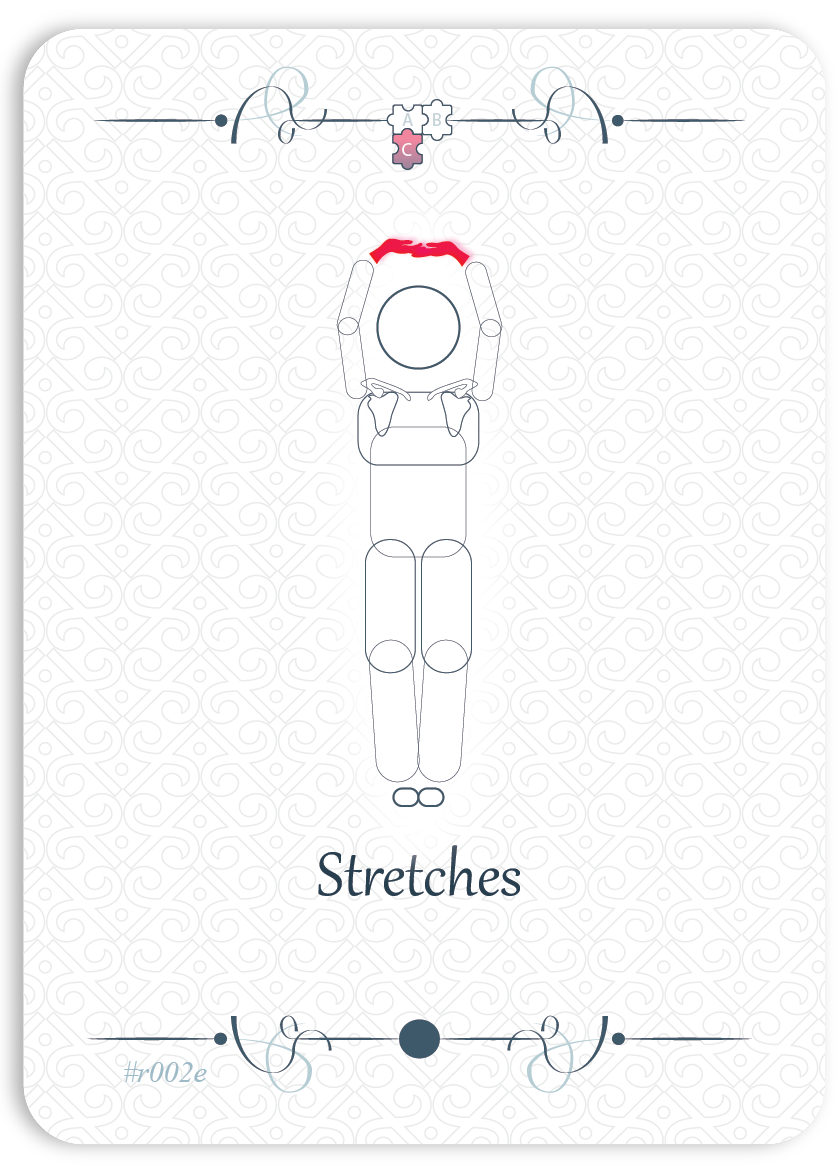
Stretches
step 1 /3 | card 02 /14 | 02/54
Our body plays an active role in the learning process. Before starting your practice session, it’s important to wake it up. Do a short series of stretches you are already familiar with, or choose the stretches that seem most appropriate from the Stretches category.
-
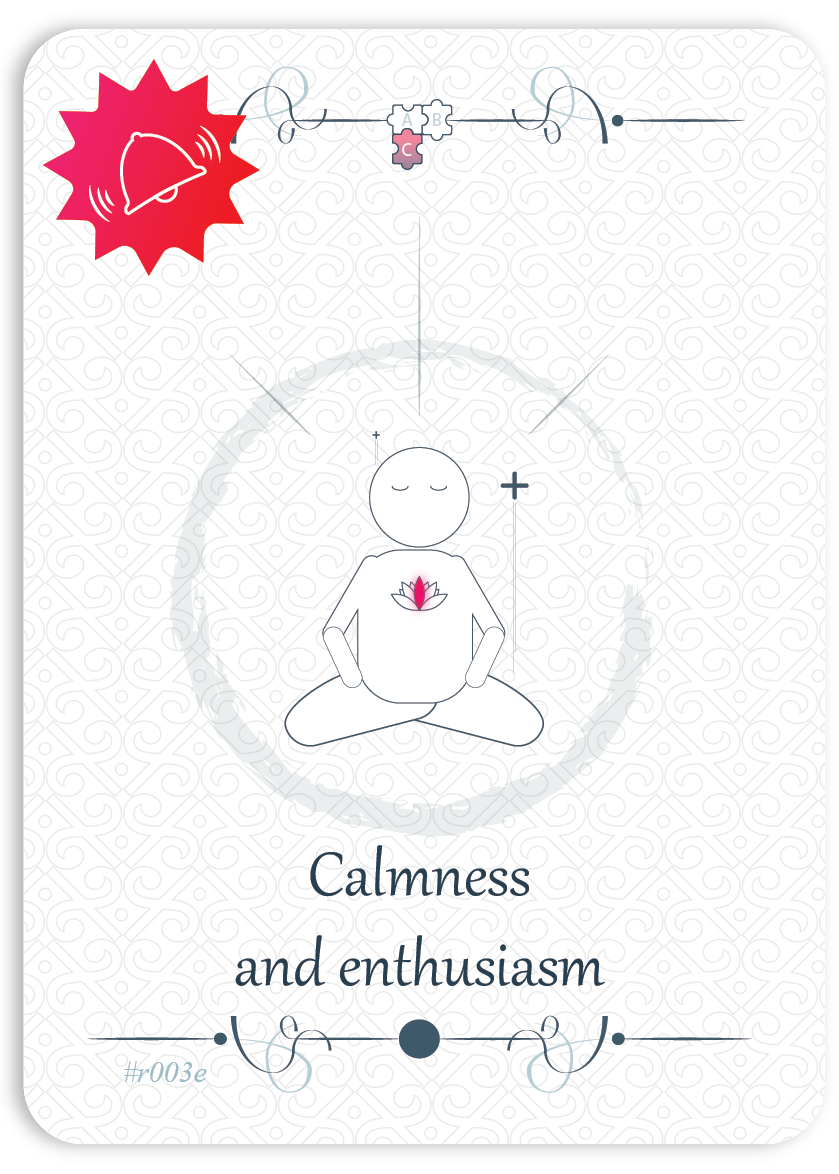
Calmness and enthusiasm
step 1 /3 | card 03 /14 | 03/54
Take three deep breaths and imagine yourself soon becoming the musician who has mastered the section of the piece you’ve been aiming to play.
-
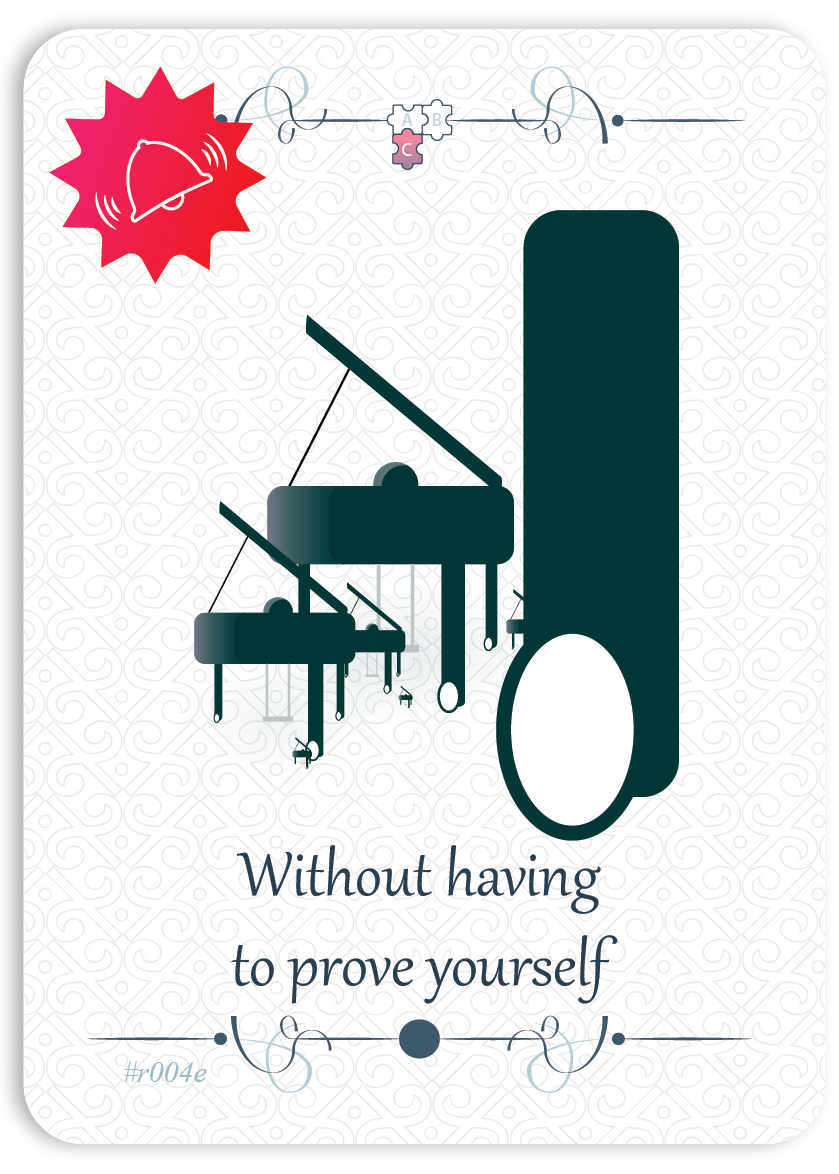
Without having to prove yourself
step 1 /3 | card 04 /14 | 04/54
It’s essential to remember that when we are learning something, we don’t yet fully master it. There’s no need to prove your skill right from the start. Similarly, trying to learn too quickly can be counterproductive. Absorbing new information and skills will take the time it needs—no more, no less. Be patient and allow the process to unfold at its own pace.
-
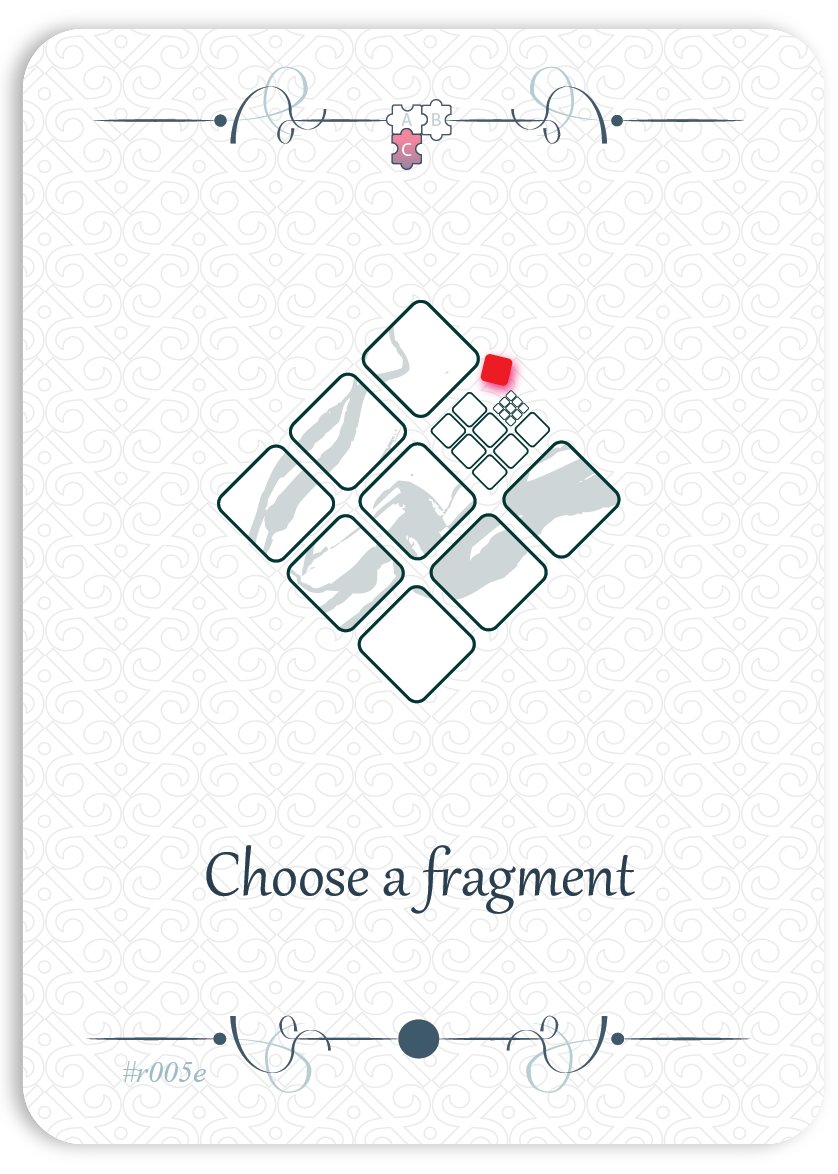
Choose a fragment
step 1 /3 | card 05 /14 | 05/54
It can be challenging to maintain focus on an entire new piece. That’s why we suggest thinking of it as a series of short musical sections. We will call these sections fragments, each spanning 2 to 4 measures.
-
Choose a fragment to work on.
-
When applying the exercises that follow to your chosen fragment, stop at the first note of the next fragment (on the downbeat).
-
Avoid going beyond the fragment you have decided to work on.
-
-
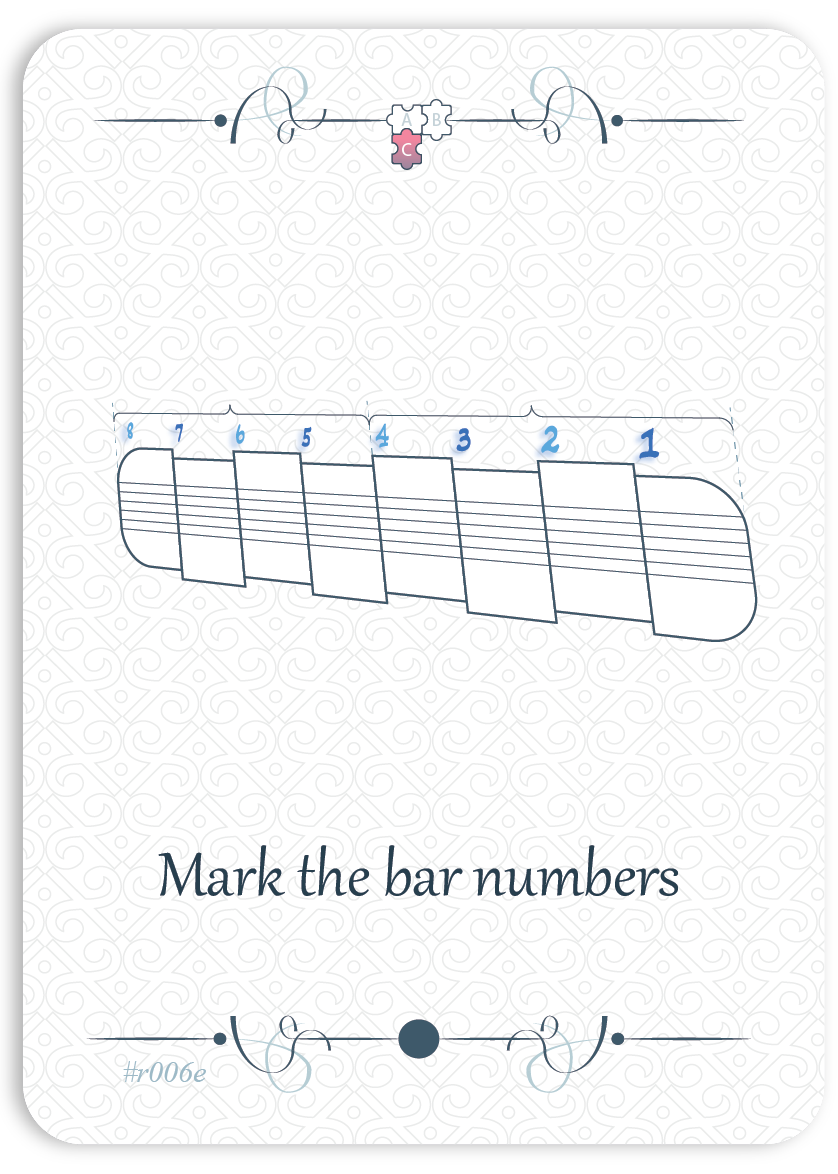
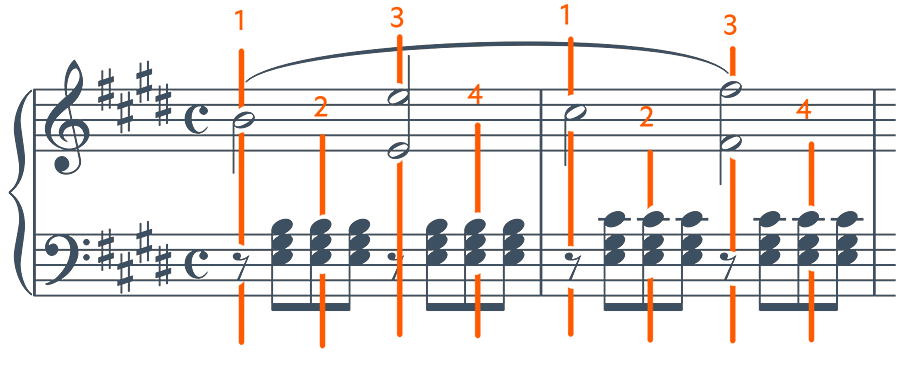
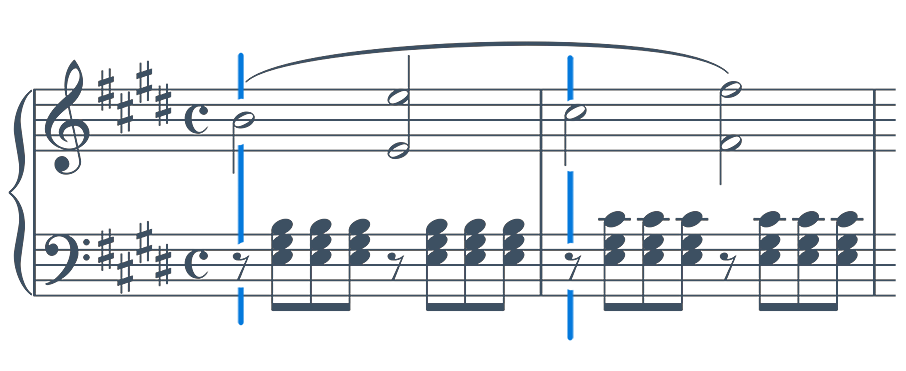
Mark the bar numbers
step 1 /3 | card 06 /14 | 06/54
To better understand the uniqueness (or cohesion) of the fragment you have chosen, write the number of each bar above the bar line.
Suppose your fragment has 4 bars. In this case, write the bar numbers in reverse order, as follows:
“4” for bar 1;
“3” for bar 2;
“2” for bar 3;
“1” for bar 4.This reverse numbering is very useful, as it shows the number of bars remaining before the next fragment.
This notation will be helpful when you perform an exercise in which you play while saying the bar numbers aloud.
-
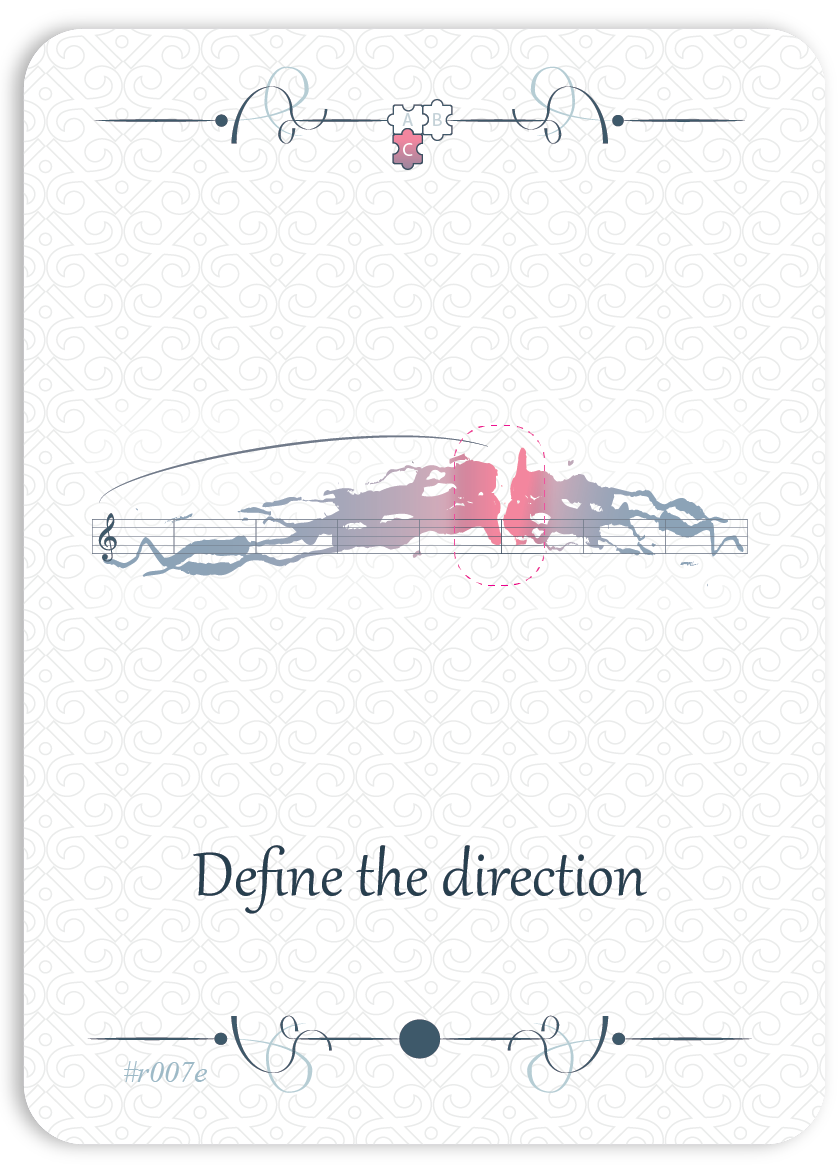
Define the direction
step 1 /3 | card 07 /14 | 07/54
Try to identify the notable musical event in the fragment you have chosen. This could be a dynamic change — a forte, a pianissimo, or an accent—or even a harmonic color that stands out from the rest. Often, this event is preceded by a “progression” —crescendo, diminuendo, accelerando, ritenuto, etc. Like an important star, this event acts as a kind of “center of gravity” that draws in the musical material, also known as a “climax” or “high point.”
-
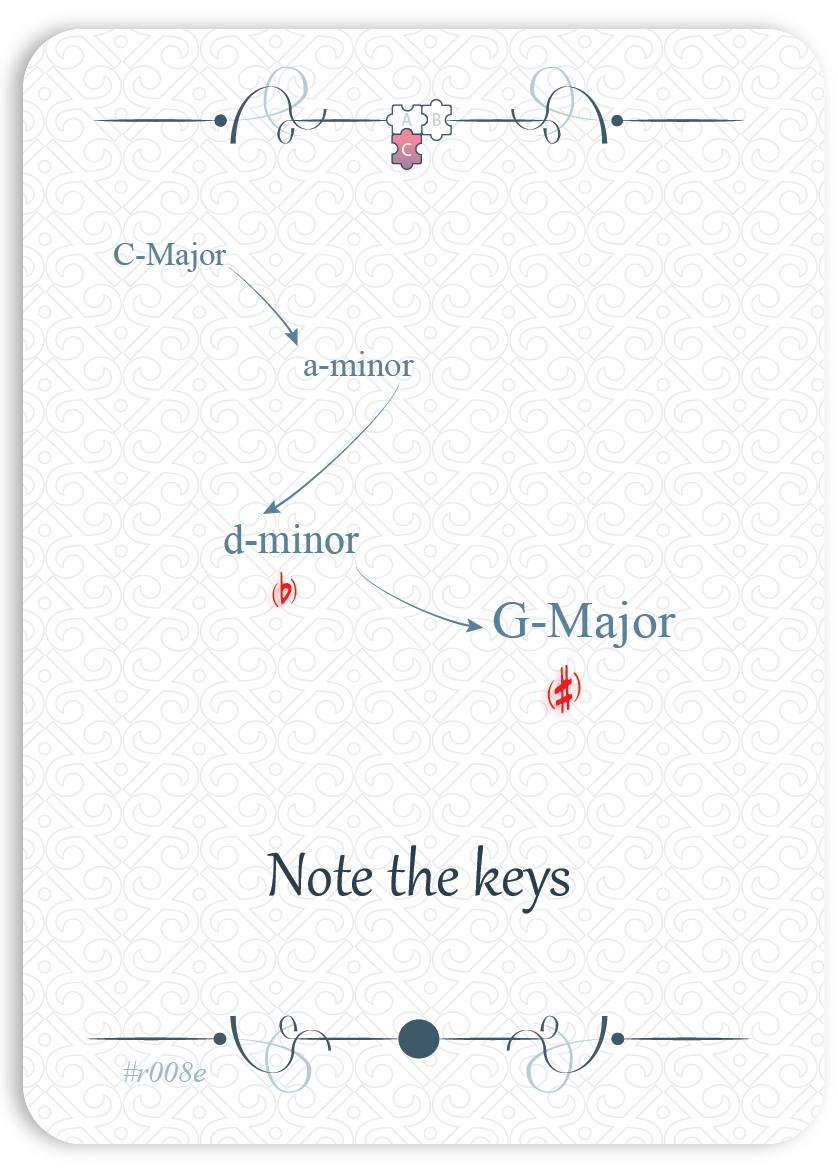
Note the keys
step 1 /3 | card 08 /14 | 08/54
Noting the keys is useful for creating a kind of mental map marked by milestones, which will guide your journey through the fragment you are working on.
-
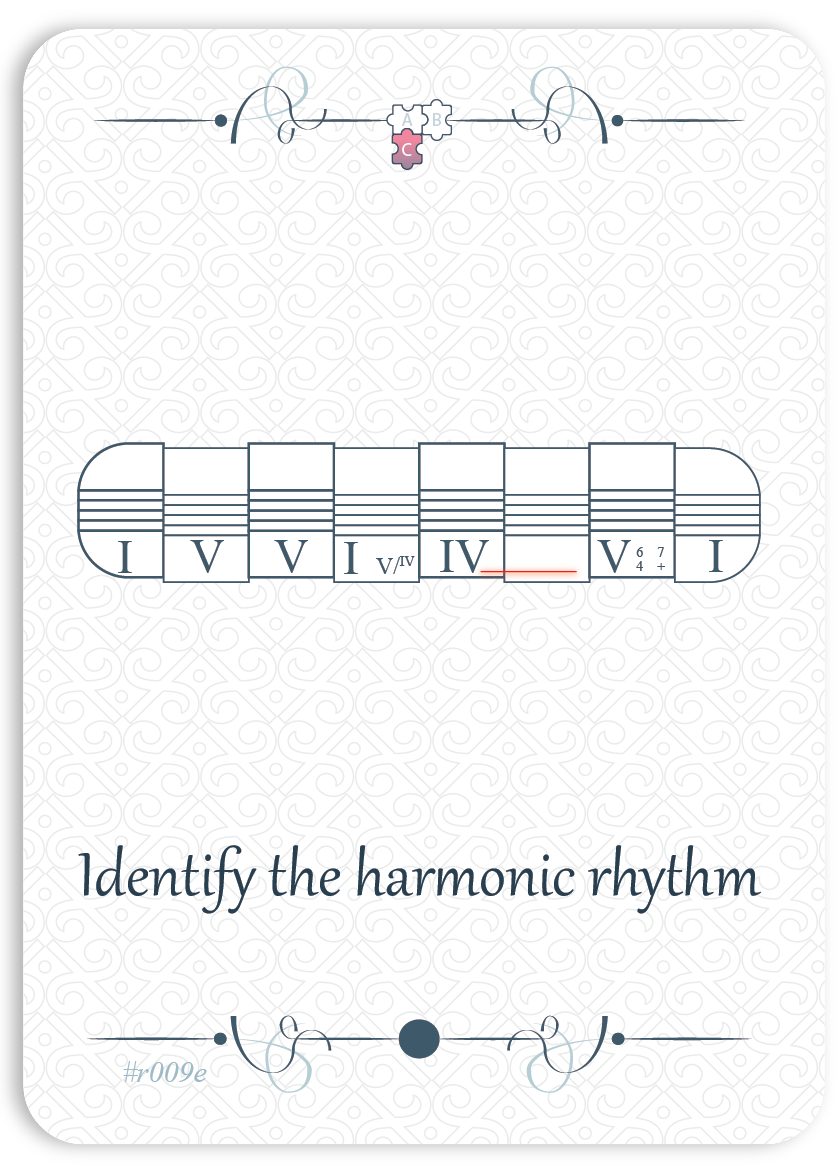
Identify the harmonic rhythm
step 1 /3 | card 09 /14 | 09/54
The “harmonic rhythm” refers to the rate at which the harmonies change. Often, a new bass note (the lowest note) signals this change.
Notice these changes and keep track of how many different harmonies appear in the section.
If possible, notate them using chord symbols.
This information will be useful later in the “Choral” exercise.
-
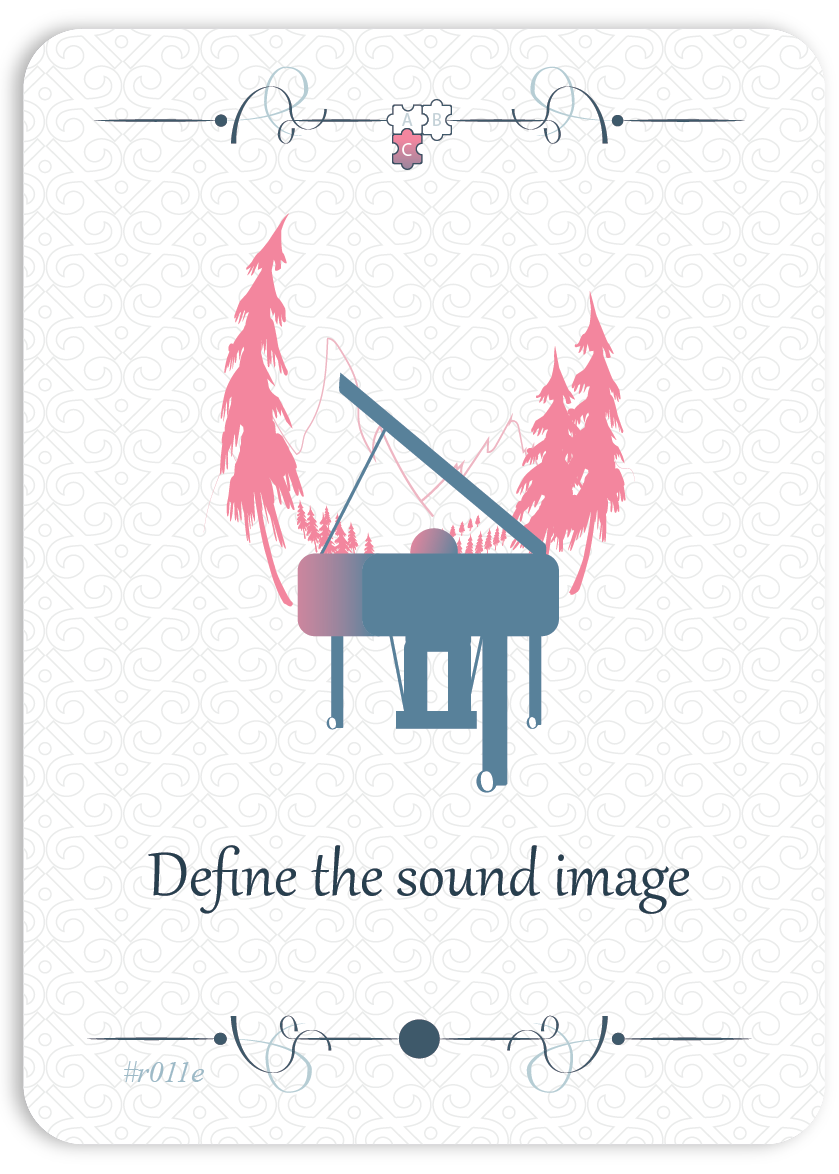
Define the sound image
step 1 /3 | card 10 /14 | 10/54
“Sound image” refers to what the music represents for you. Ask yourself what “story” lies at the heart of the fragment you are working on. Does it evoke a particular emotion? Does it remind you of real-life events? During this stage of learning, the goal is to articulate the “deep” motivation that makes you want to play this fragment. This motivation is sometimes called the “artistic task”. Consider what you want to communicate through this section to your audience. Even if your “narrative” doesn’t reach the listener directly, the clarity of your intention will inevitably spark their imagination.
-
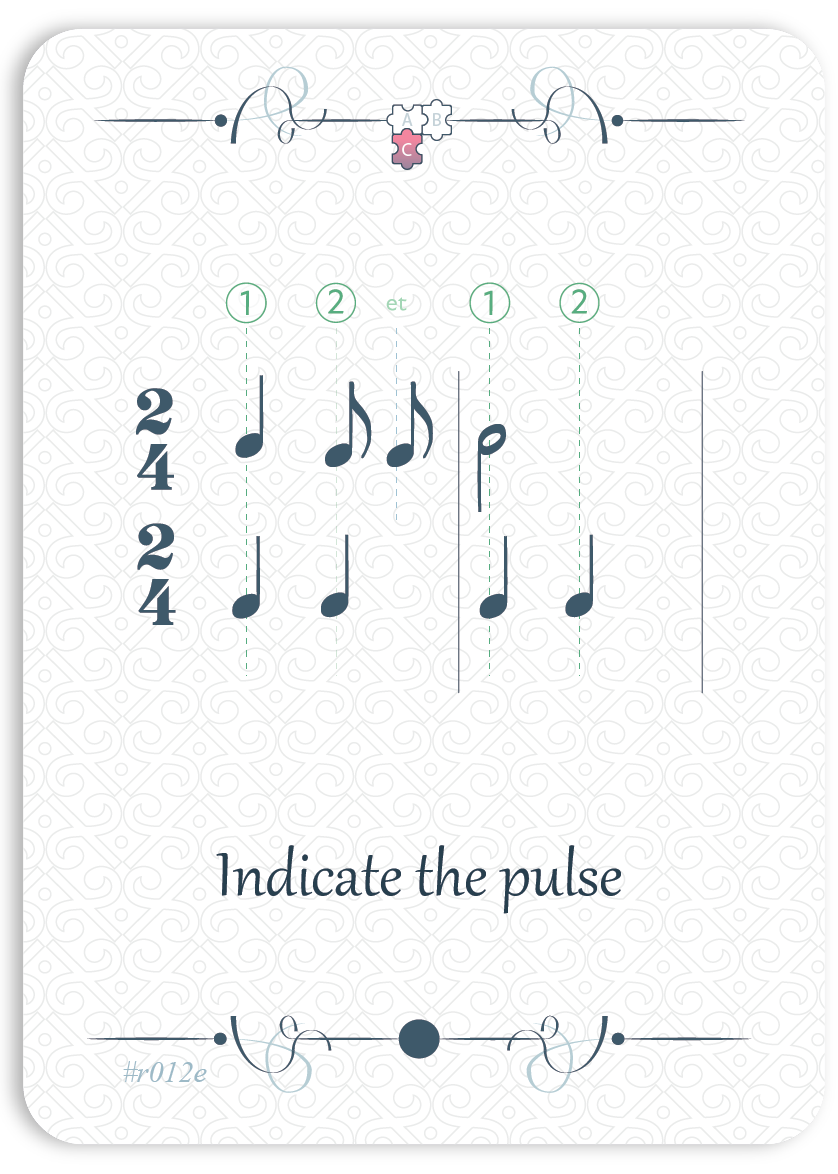
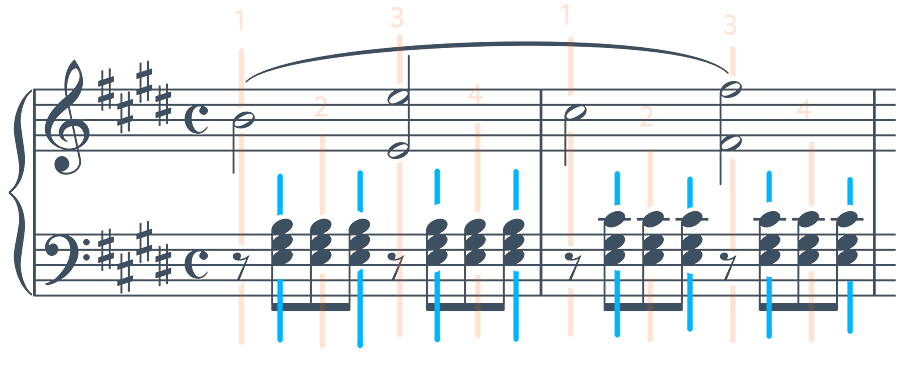
Indicate the pulse
step 1 /3 | card 11 /14 | 11/54
Like a heartbeat, the pulse is a musical pulse that serves as a reference when we listen to music. When we play, it is important to communicate this pulse clearly; otherwise, the listener will not be able to "understand" the musical content. The first step is to identify this pulse. Place the “pulse bars” by drawing lines that cross both staves (this approach is useful because it highlights the coordination between the hands). The space between two bars must correspond to one “beat.” The time that elapses between the two pulse bars is always the same.
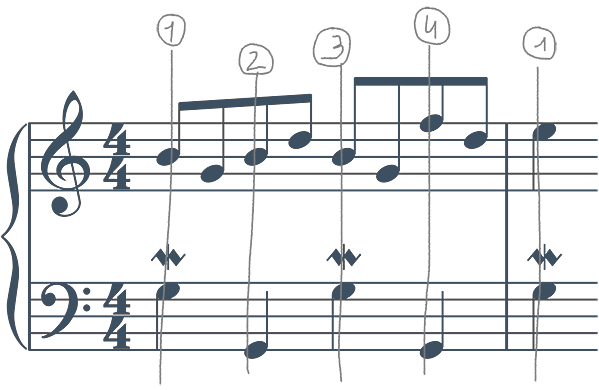
BACH – Little Prelude No. 1, BWV 939 (mm. 9) -
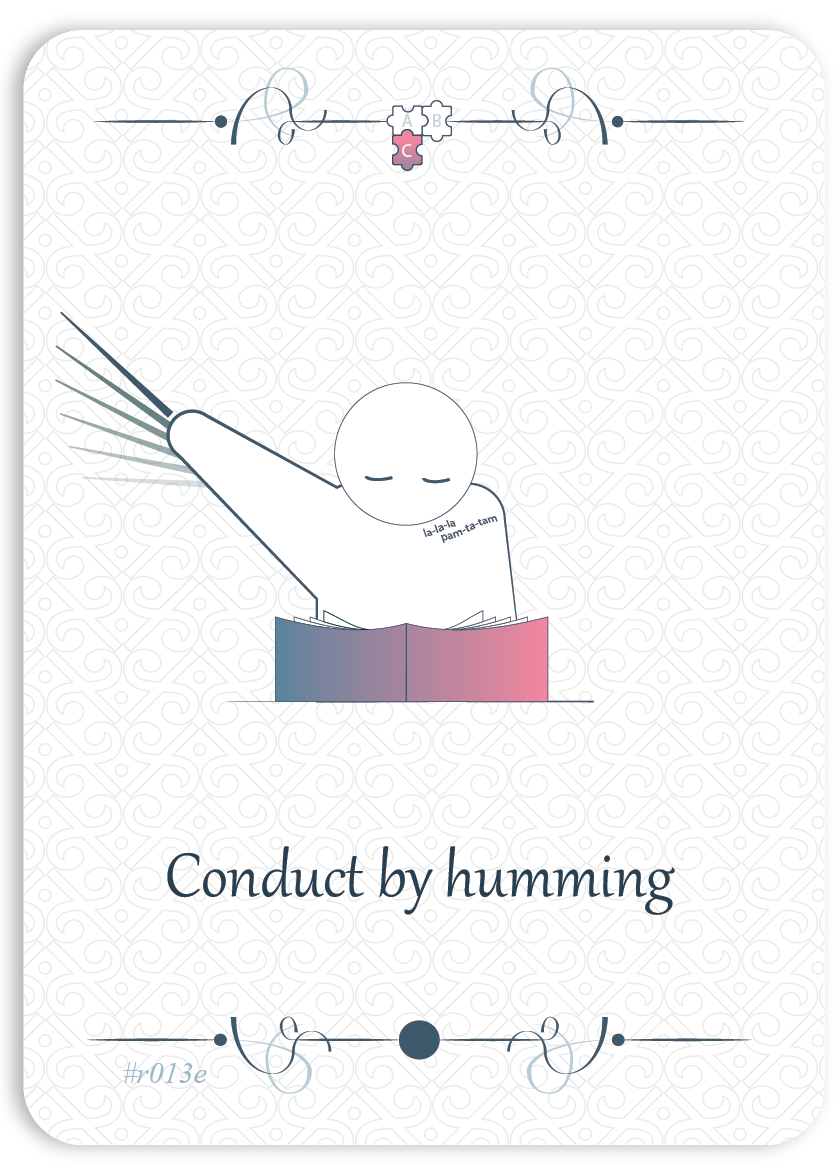
Conduct by humming
step 1 /3 | card 12 /14 | 12/54
Humming = Singing softly
Before playing, softly sing the melody of the section as if it were a lullaby, while keeping the beat or conducting. This “song” will serve as a model that you will later elaborate and embellish with your instrument. Remember that dynamics1, articulations2, and progressions3 are all part of the music.
Download the sheets:
1 Dynamics : piano, forte, mezzo-forte, pianissimo. Also called dynamics, these indicate the different ways to convey musical content—for example, softly (piano), powerfully (forte), or gently (pianissimo), etc.
Download the dynamics sheet2 Articulations : legato, staccato, tenuto. These describe different ways of connecting notes: smoothly (legato), detached (staccato), or paying particular attention to how the sound is released after its duration (tenuto).
3 Progressions : crescendo (gradually louder), diminuendo (gradually softer), accelerando (gradually faster), ritenuto (slowing down). These describe gradual changes in dynamics or tempo.
-
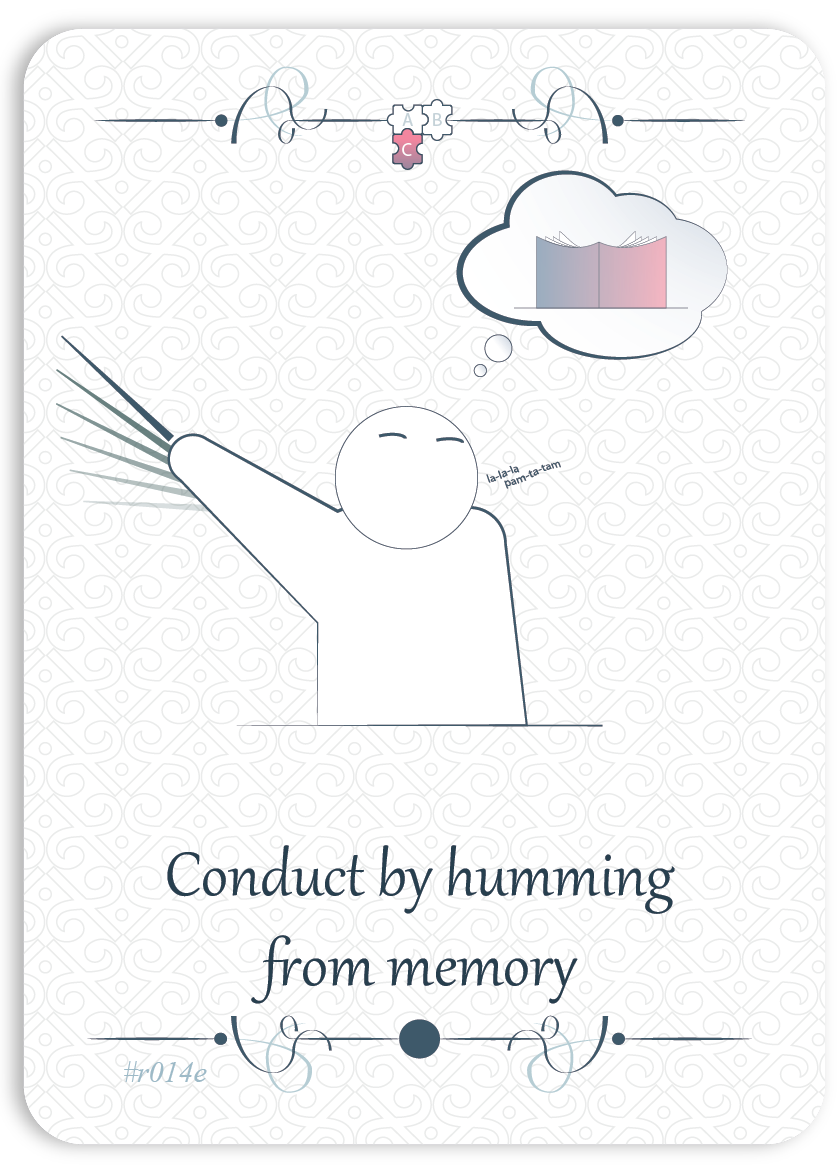
Conduct by humming from memory
step 1 /3 | card 13 /14 | 13/54
Now that you know the melody, sing the same song from memory while keeping the beat or conducting, without looking at the score. Repeat this several times.
-
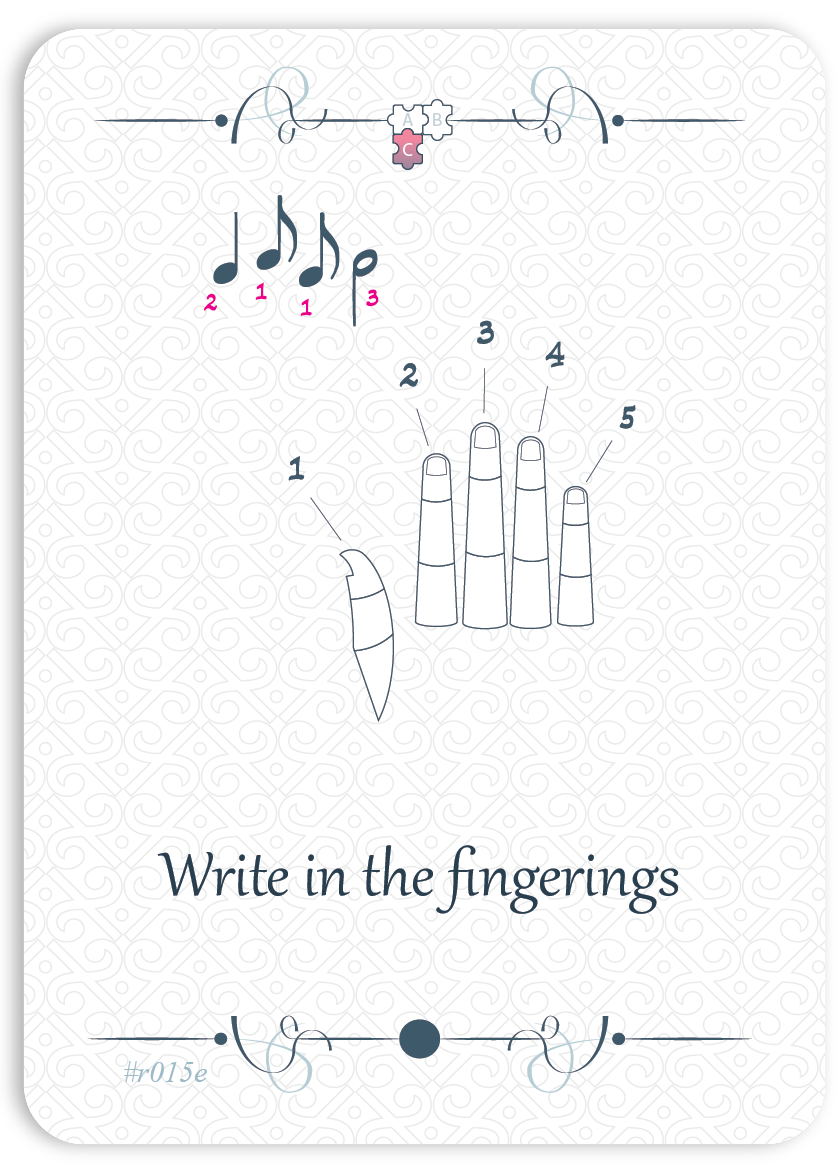
Write in the fingerings
step 1 /3 | card 14 /14 | 14/54
Noting fingerings on the score is helpful for remembering hand positions on the keyboard. By repeating a passage with the same fingering, you will save a lot of time during practice.
Start by trying the fingerings already indicated on the score. If they work well for you, keep them and fill in any missing fingerings. If they don’t suit you, cross them out and replace them with your own.
If no fingerings are provided, write down the first fingering that comes to mind for each note. Try it out, and adjust as needed.
Keep in mind that fingerings may change as you continue learning the piece. As you become more familiar with it, you might find yourself naturally changing fingerings. It is essential to rewrite them on the score each time you find a better solution.
-
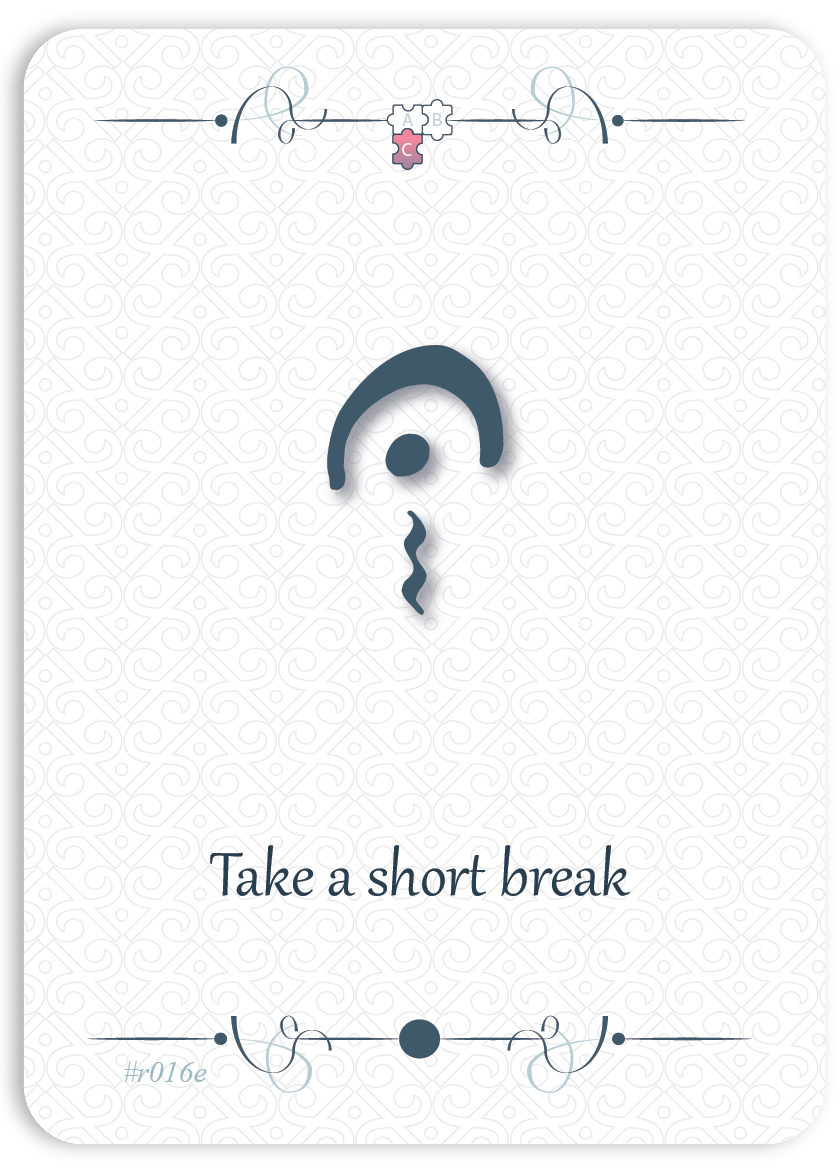
Take a short break
Well done! You have completed the 1st step.
Before continuing, take a short break, because after a period of learning, our brain needs time to “digest” the information. Use this moment to pour yourself a glass of water, stretch, or simply gaze out the window.
-
Step II
20 minutes
The second step is a very meticulous phase of learning, focused on getting to know the notes and rhythms while working on hand coordination.
This stage includes 25 cards:
Listening?
Posture
Without pedals
Slow tempo – smooth connection
Noting the left-hand intervals
Playing the left hand while singing
Playing the left hand while walking the beat
Playing the left hand while counting the beats
Playing the left hand while counting the measures
Noting the right-hand intervals
Playing the right hand while singing
Playing the right hand while walking the beat
Playing the right hand while counting the beats
Playing the right hand while counting the measures
Playing the right hand while singing the left hand
Playing the left hand while singing the right hand
Singing / Listening
Choral practice
Release the wrist, elbow, and collarbone
Hands together while walking the beat
Walk the beat measure by measure
Hands together while counting the beats
Hands together while singing the left hand
Left hand from memory
Hands together with the pedal
-
Listening ?
step 2 /3 | card 01 /25 | 15/54
At this stage, you have a choice between two approaches:
- Listen to one or more interpretations of your piece (or just the fragment you are working on) to build on a set of references that guide you.
- Deliberately avoid listening to recordings in order to firmly establish the foundations of your interpretation independently, without external influence.
-
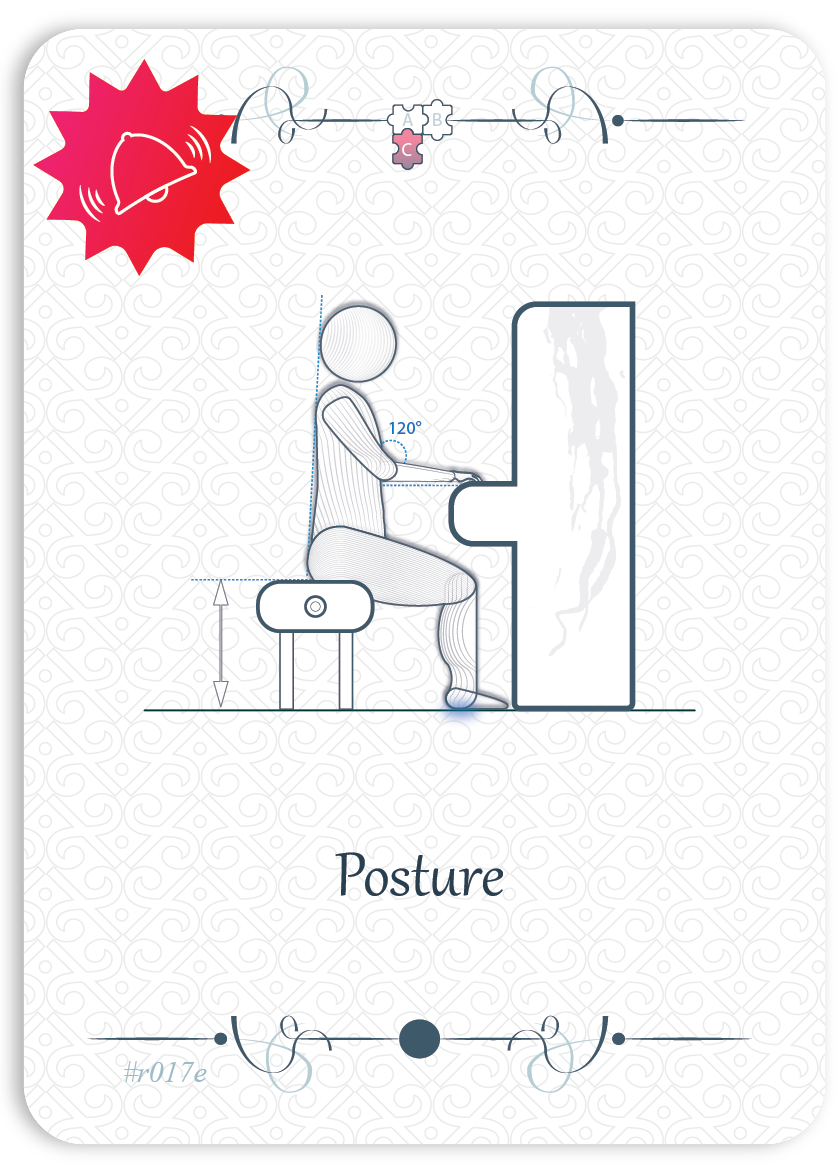
Posture
step 2 /3 | card 02 /25 | 16/54
Before placing your hands on the keyboard, make sure you are seated in a way that allows a comfortable and optimal posture for playing the piano.
Here are some tips to follow:
- Choose a stool that is firm enough (but not too hard) so your pelvis is well supported. Avoid sitting in a chair or on a sofa.
- Adjust the height of the stool and its distance from the piano so that your elbows are open at an angle of 100° to 120°.
- Imagine that the white keys extend infinitely behind you, forming a plane. Then place your elbows on this imaginary plane.
- In your mind, visualize a horizontal division of your stool and sit on the half closest to the instrument.
- Make sure your feet touch the floor. If not, use a pedal riser or a support such as a wooden box to fill the gap.
- Maintain a connection with the floor so you can stand up at any time.
- Orient your head so that it “leads” you toward the ceiling.
- Be mindful of the space between the piano and your torso. To better sense it, imagine you are holding a large ball.
-
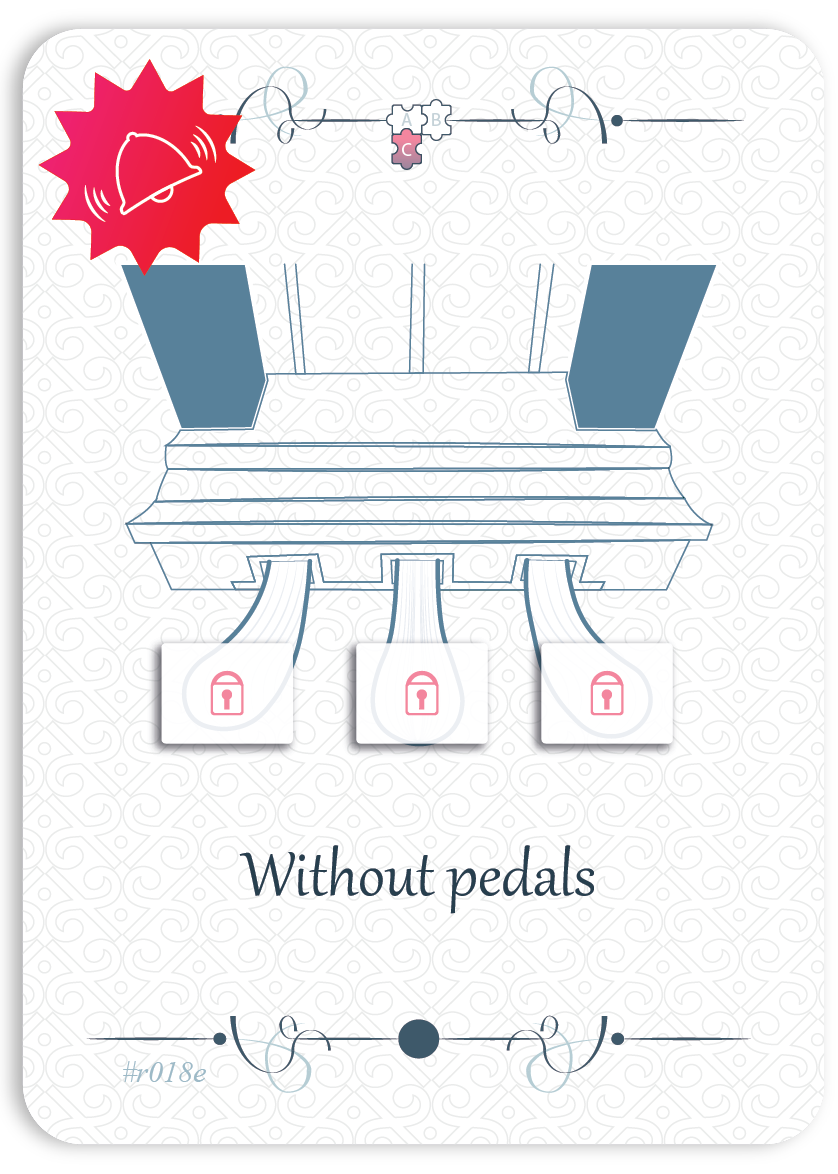
Without pedals
step 2 /3 | card 03 /25 | 17/54
-
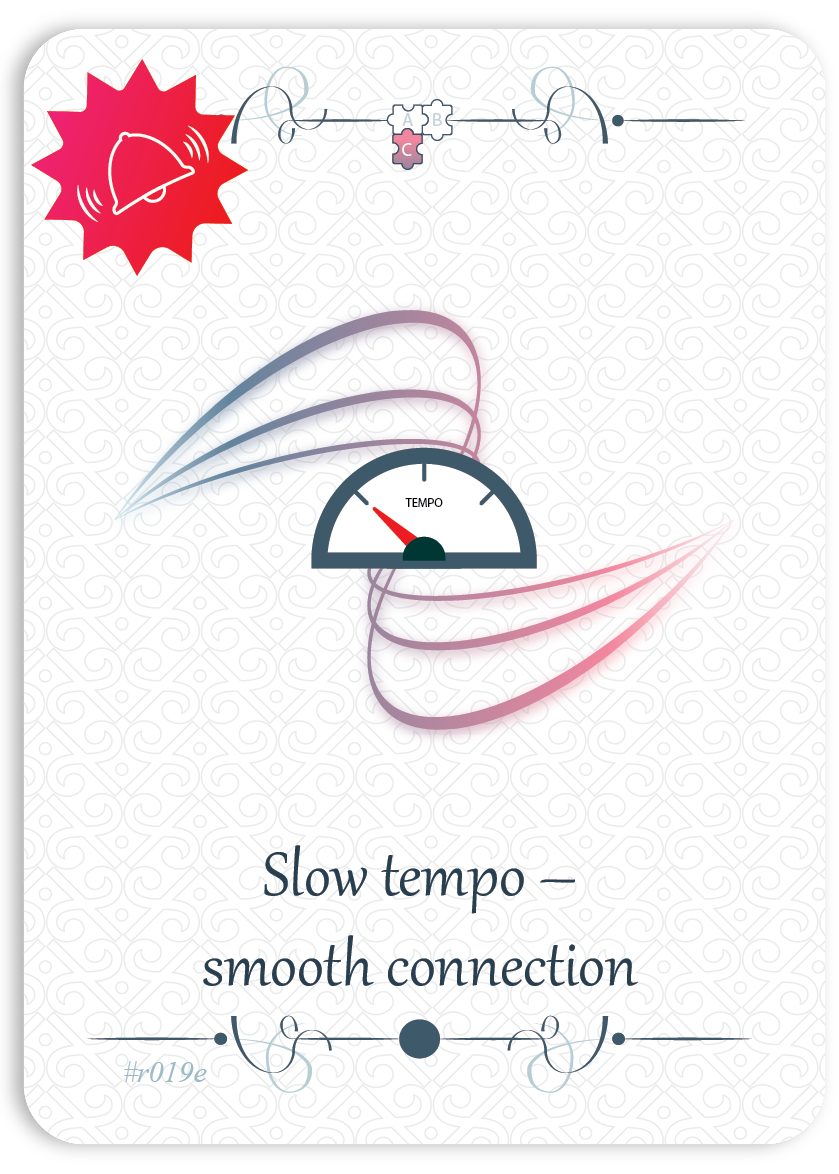
Slow tempo – smooth connection
step 2 /3 | card 04 /25 | 18/54
Select a tempo that feels comfortable and allows you to maintain a steady pulse without significantly altering the rhythms. Avoid repeating notes or chords unnecessarily. Focus on playing through the entire fragment you’ve chosen in a continuous flow.
-
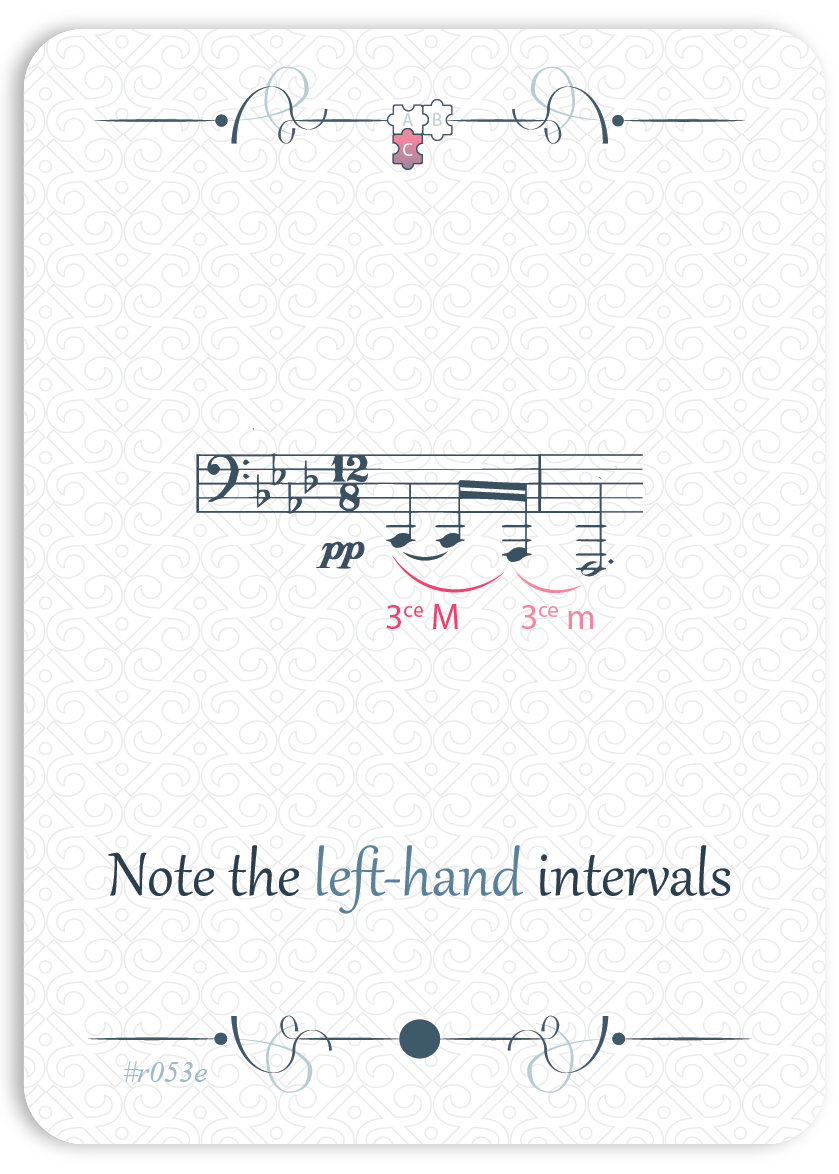
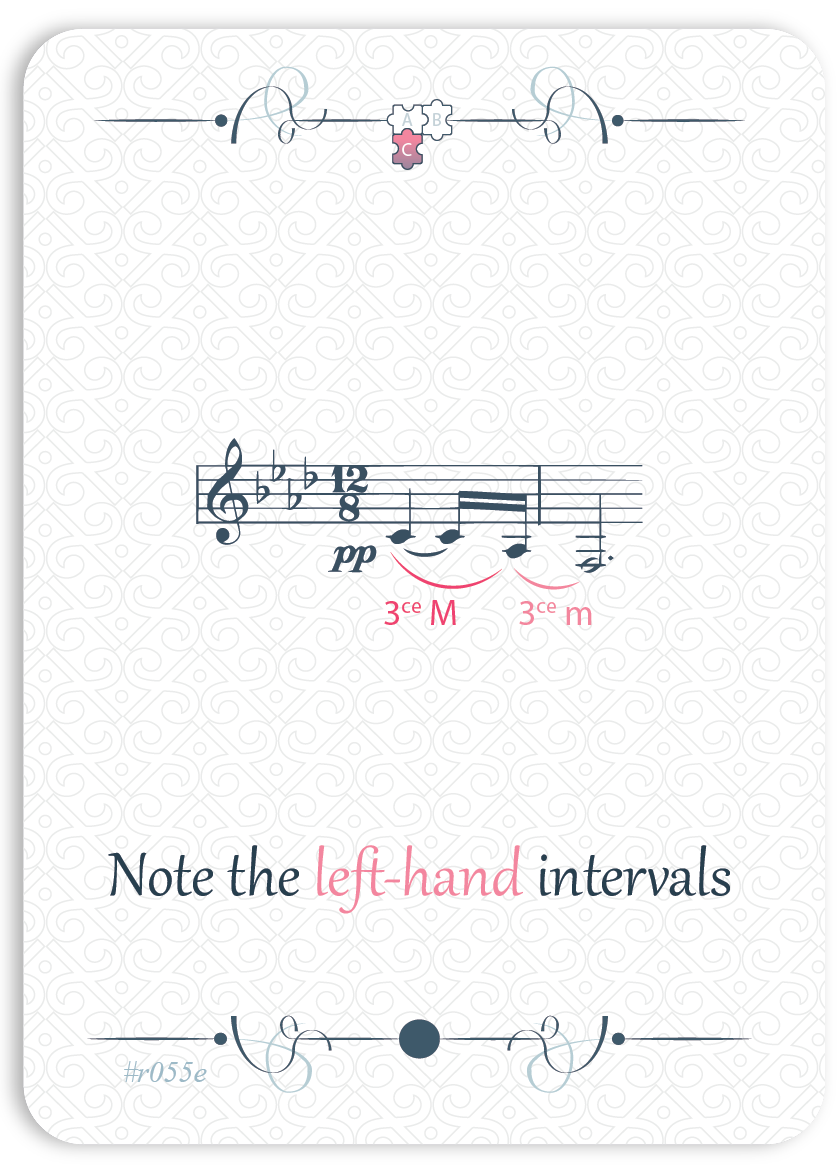
Note the left-hand intervals
step 2 /3 | card 05 /25 | 19/54
Write down the intervals in the bass line and say them out loud.
Do the same for the inner voices as well. -
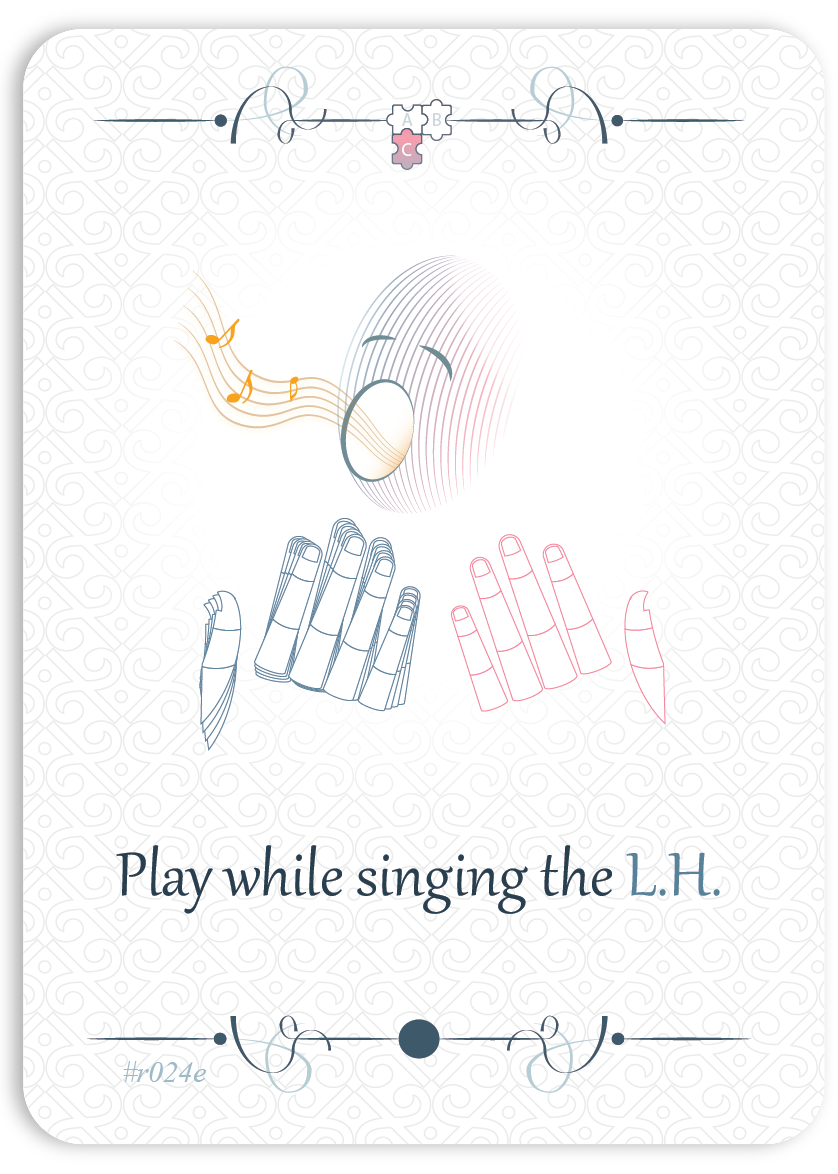
Play while Singing the Left Hand
step 2 /3 | card 06 /25 | 20/54
The left hand is itself a broad melody, very different from that of the right hand. It is essential to be able to sing it clearly and memorize it so that it can fully support the right hand.
Sing the left-hand part while playing, naming the notes as you go. Be sure to sing with attention to the dynamics1, articulations2, and progressions3.
Without saying the note names aloud, play again and try to hear the note names resonating internally as you play.
1 Dynamics : piano, forte, mezzo-forte, pianissimo. Also called dynamic markings, these are the different ways of expressing musical content, for example with a soft voice (piano), a powerful one (forte), or a delicate one (pianissimo), etc. Download the sheet dynamics
2 Articulations : legato, staccato, tenuto. These are the different ways of moving from one note to another: smoothly connected (legato), detached (staccato), or paying special attention to how the sound is held and released (tenuto).
3 Progressions: crescendo (gradually louder), diminuendo (gradually softer), accelerando (gradually faster), ritenuto (gradually slowing down). These are gradual ways of changing dynamics or tempo step by step.
-
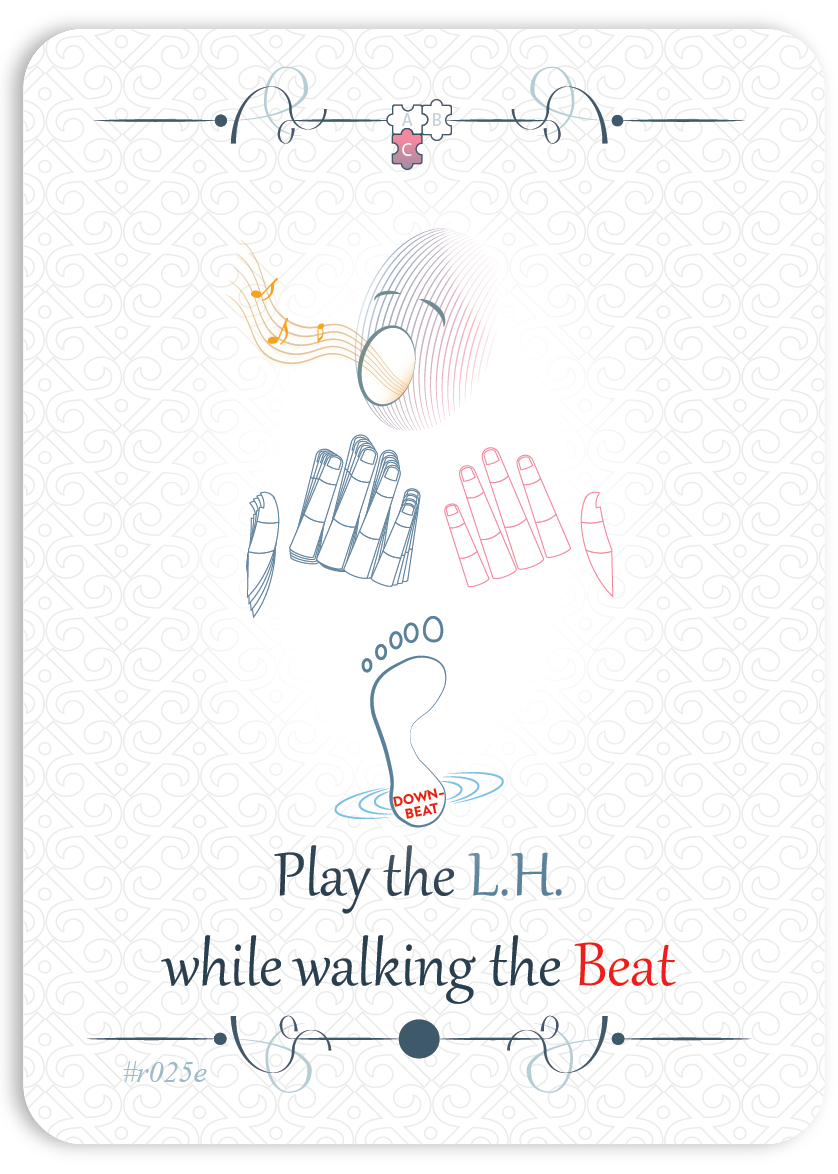
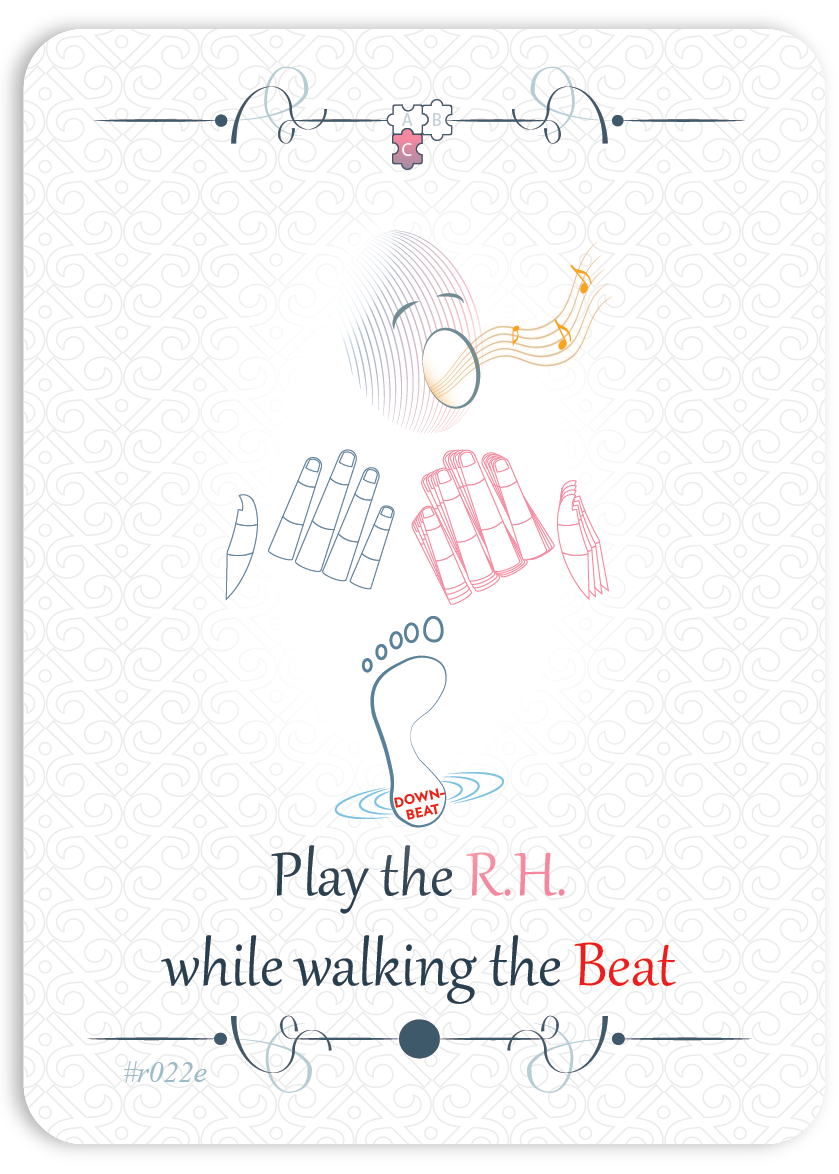
Play Left Hand while Walking the Beat
step 2 /3 | card 07 /25 | 21/54
Play the left hand, sing, and “walk” the beat while following the beat lines you wrote earlier. Walking the beat means lifting your feet alternately (one, then the other) so that each foot comes fully off the ground and returns to the floor exactly in time with the note being played and sung.
-
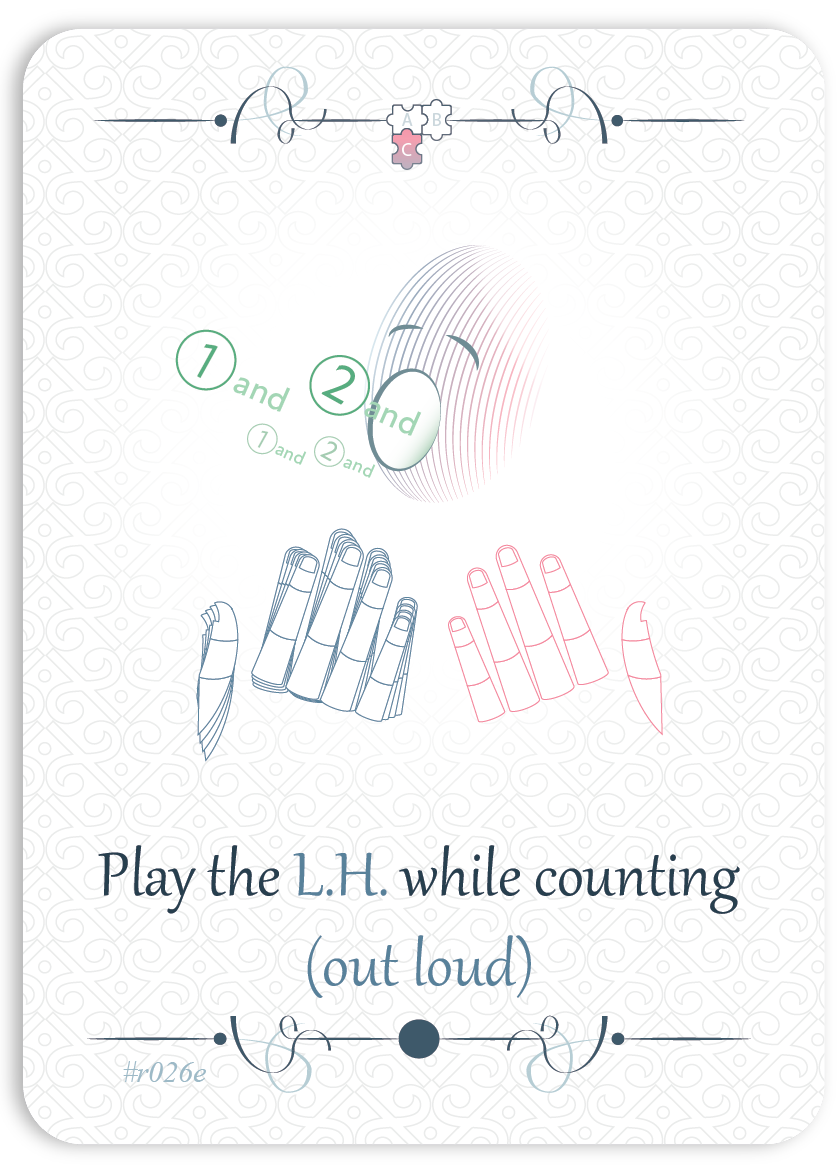
Play the left hand while counting
step 2 /3 | card 08 /25 | 22/54
While following the pulse markings you wrote, play the left hand and count the beats out loud. Try several ways of counting:
- Count in a very detached manner, saying “1,” “2,” “3,” “4” sharply and unemotionally, while keeping a steady pulse without speeding up or slowing down.
- Try counting with dynamics1, louder or softer, according to what is indicated on the score.
1 Dynamics : piano, forte, mezzo-forte, pianissimo. These indicate different ways of expressing musical content—for example, softly (piano), powerfully (forte), or gently (pianissimo), etc. Download the dynamics sheet
-
Play the left hand while counting the bars aloud
step 2 /3 | card 09 /25 | 23/54
To develop a sense of unity within the fragment, play the left hand while counting aloud the number of each measure you noted earlier.
-
Noting the right-hand intervals
step 2 /3 | card 10 /25 | 24/54
Write down the intervals in the melodic line and say them out loud.
-
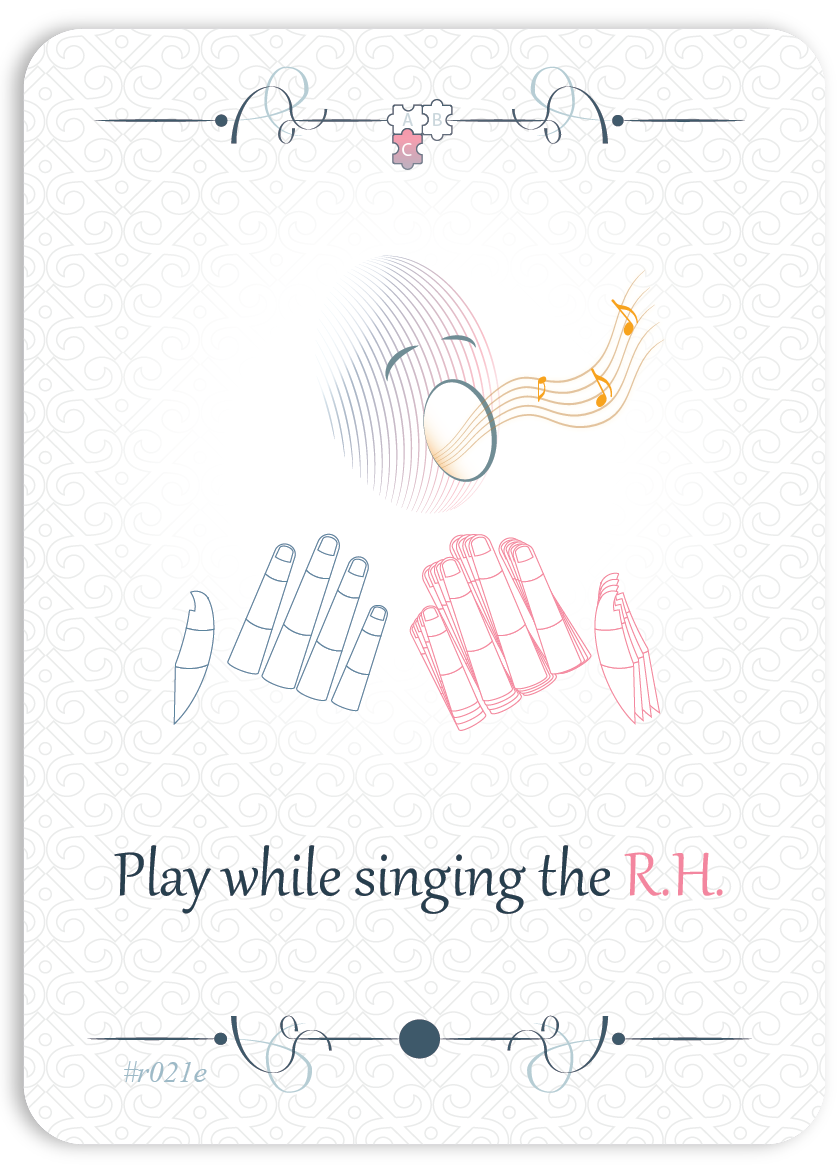
Play while Singing the Right Hand
step 2 /3 | card 11 /25 | 25/54
Sing the right-hand part using the note names while playing. Be sure to sing with attention to dynamics1, articulations2, and progressions3.
Without saying the note names out loud, play the part and try to listen internally to how the note names resonate within you.
1 Dynamics: piano, forte, mezzo-forte, pianissimo. Also called dynamics, these are different ways to convey musical content, for example with a soft voice (piano), strong (forte), or gentle (pianissimo), etc.
Download the dynamics sheet2 Articulations: legato, staccato, tenuto. These are different ways of connecting one note to another—smoothly (legato), detached (staccato), or paying special attention to how the sound is held and released (tenuto).
3 Progressions: crescendo (gradually getting louder), diminuendo (gradually getting softer), accelerando (gradually getting faster), ritenuto (slowing down). These are gradual ways (little by little) to change dynamics or tempo.
-
Play Right Hand while Walking the Beat
step 2 /3 | card 12 /25 | 26/54
plus que la moitié !Play the right hand, sing, and “walk” the pulse while following the pulse bars you wrote earlier. Walking the pulse means lifting your feet alternately (one, then the other) so that each foot completely leaves the floor and then comes back into contact with the floor at the same time as the note is played and sung.
-
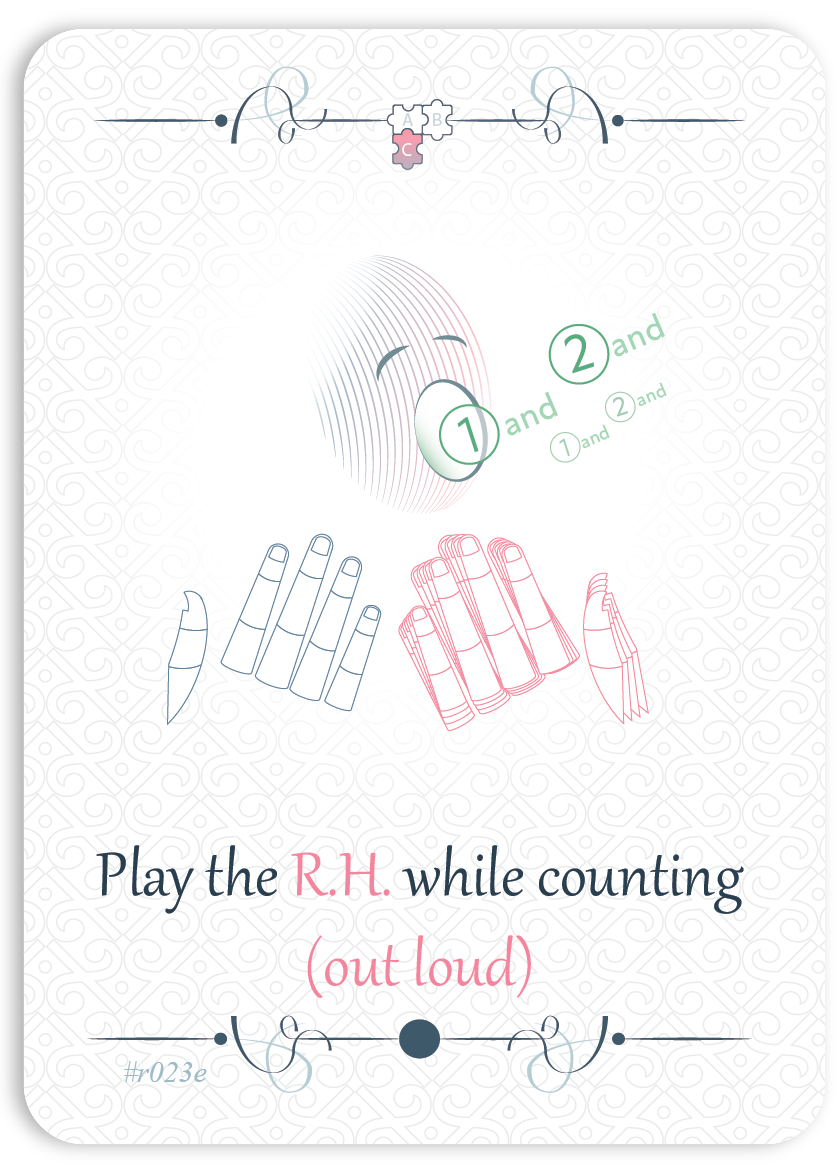
Play the right hand while counting the beats
step 2 /3 | card 13 /25 | 27/54
While following the pulse markings you wrote, play the right hand and count the beats out loud. Try several ways of counting:
- Count in a very detached manner, saying “1,” “2,” “3,” “4” sharply and without emotion, while keeping a steady pulse without speeding up or slowing down.
- Try counting with dynamics1, louder or softer, according to what is indicated on the score.
1 Dynamics : piano, forte, mezzo-forte, pianissimo. Also called dynamics, these indicate different ways of expressing musical content—for example, softly (piano), powerfully (forte), or gently (pianissimo), etc. Download the dynamics sheet
-
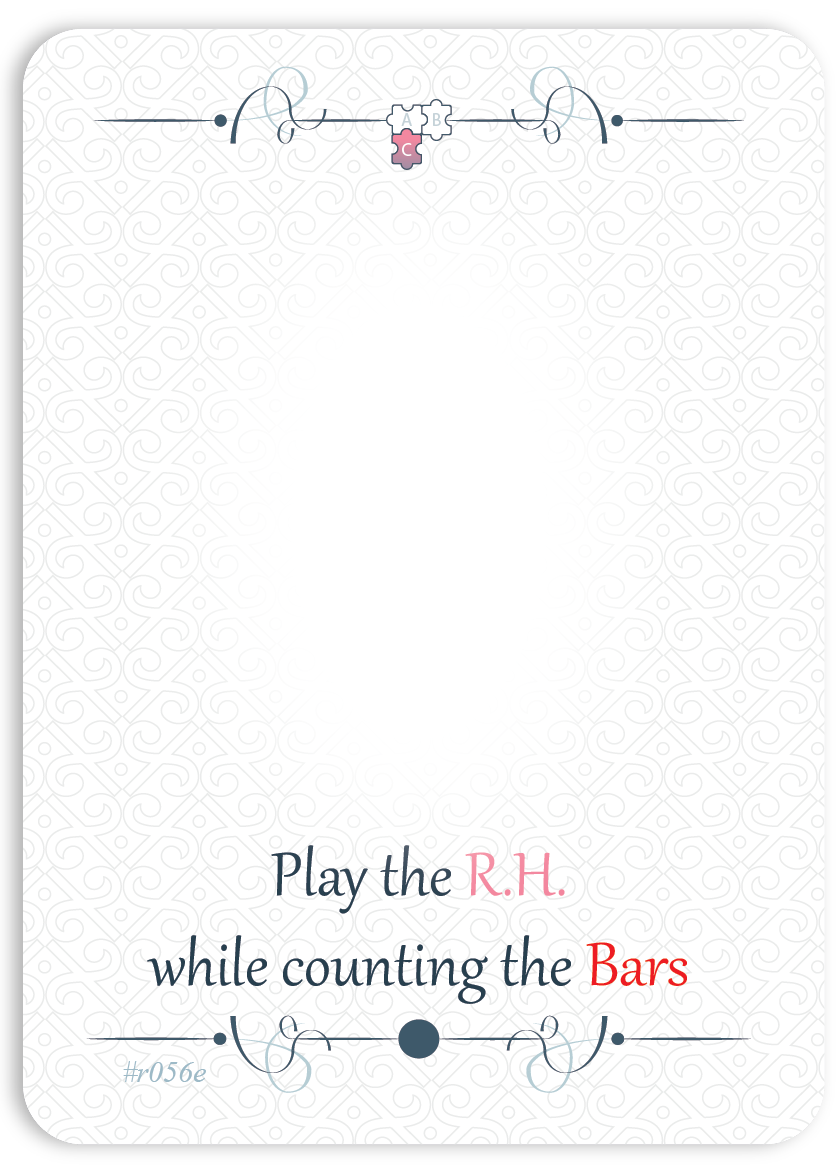
Playing the right hand while counting the bars aloud
step 2 /3 | card 14 /25 | 28/54
To develop a sense of unity within the fragment, play both hands while counting aloud the number of each bar you noted earlier.
-
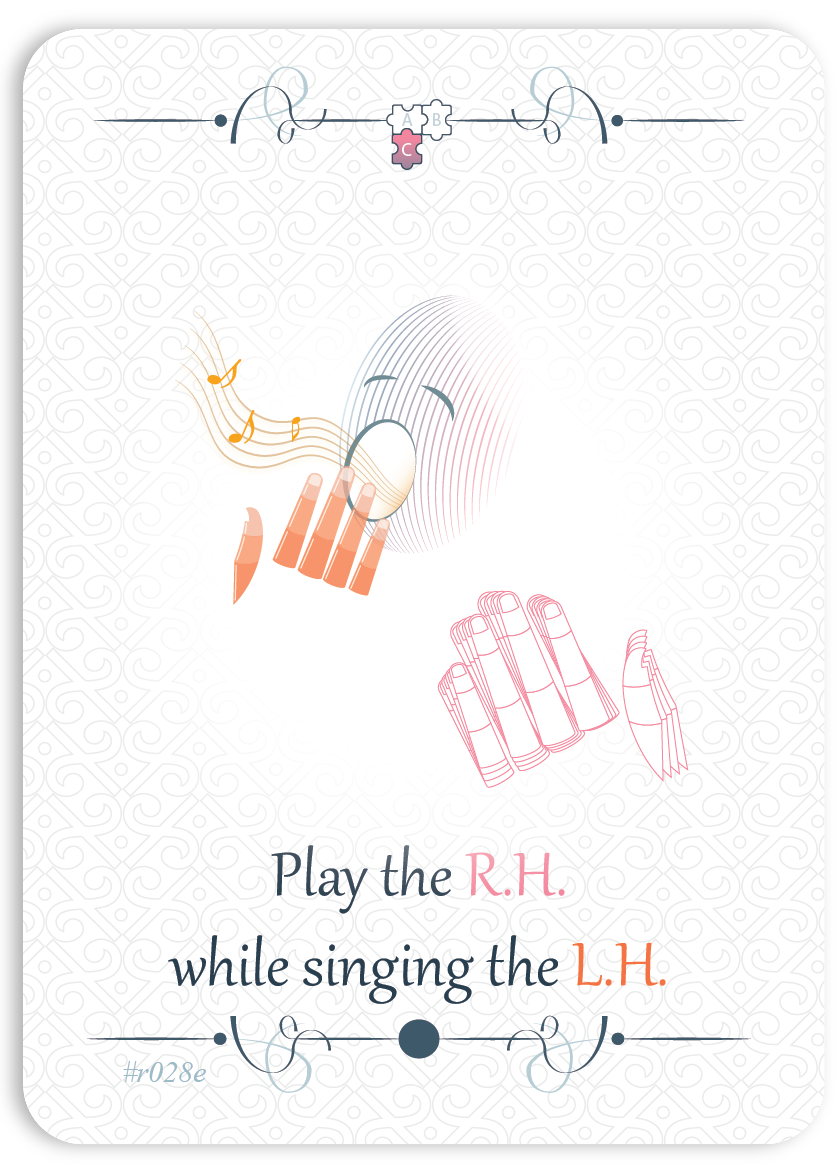
Play the right hand while singing the left hand
step 2 /3 | card 15 /25 | 29/54
Now reverse the approach: play the right hand alone while singing the left hand. If there are double notes, choose a "path": either the upper voice of the left hand or the lower voice, then switch. Turn the left-hand part (the bass) into a true melody that dialogues with and accompanies the right hand.
-
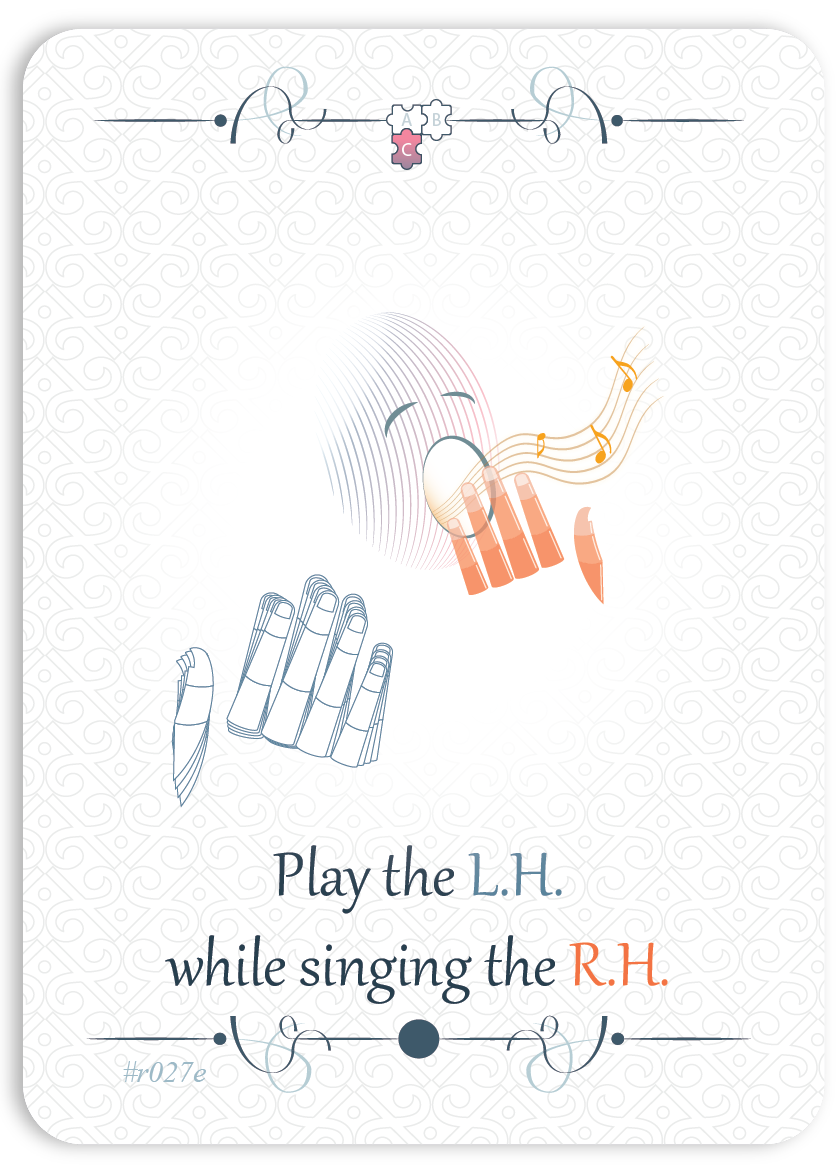
Play the left hand while singing the right hand
step 2 /3 | card 16 /25 | 30/54
Play the left hand alone while singing the right-hand part. If the right hand represents the melody of your piece, you will feel like you are accompanying yourself, which is a very pleasant sensation!
This exercise helps to develop coordination and the ability to listen to two voices simultaneously. At first, it may seem a bit difficult until you get used to it. However, persevere, because you will reap great benefits and enjoy very satisfying fluency!
-
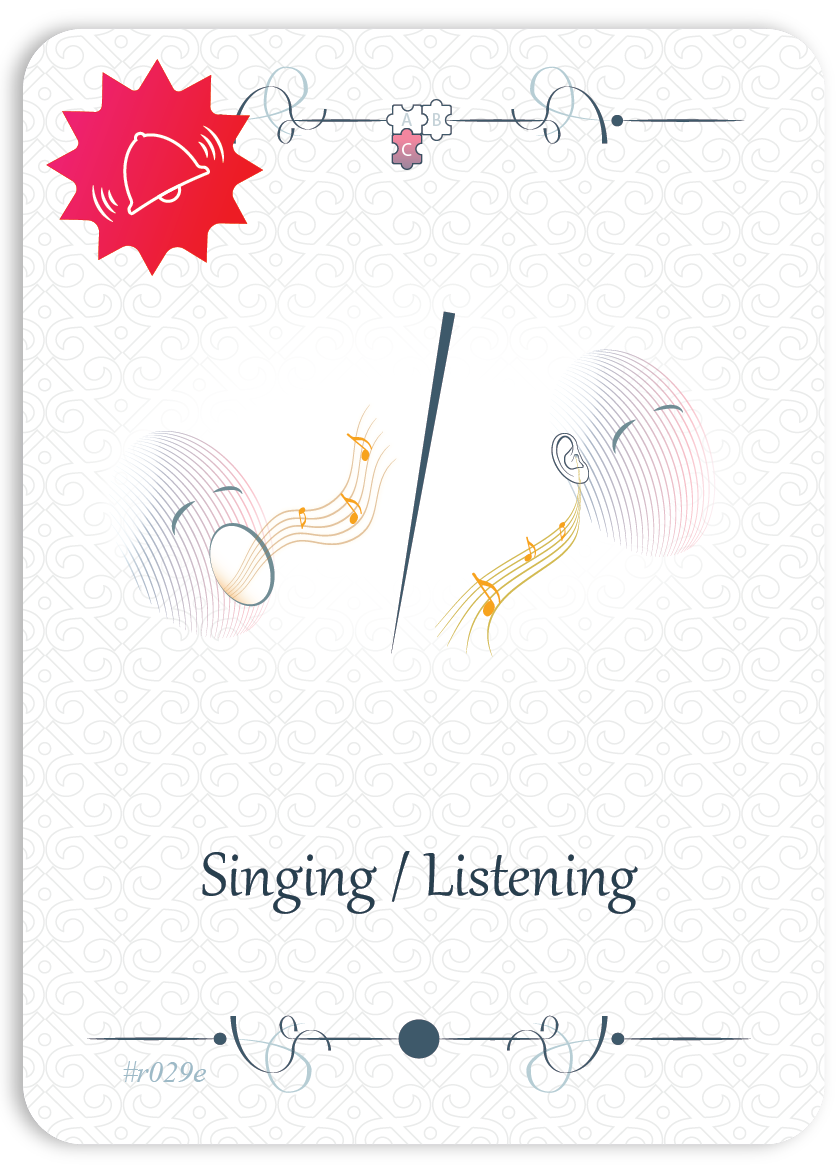
Singing / Listening
step 2 /3 | card 17 /25 | 31/54
Sing only when the card suggests it. Otherwise, listen attentively to the sound that arises from your mind and from your instrument.
-
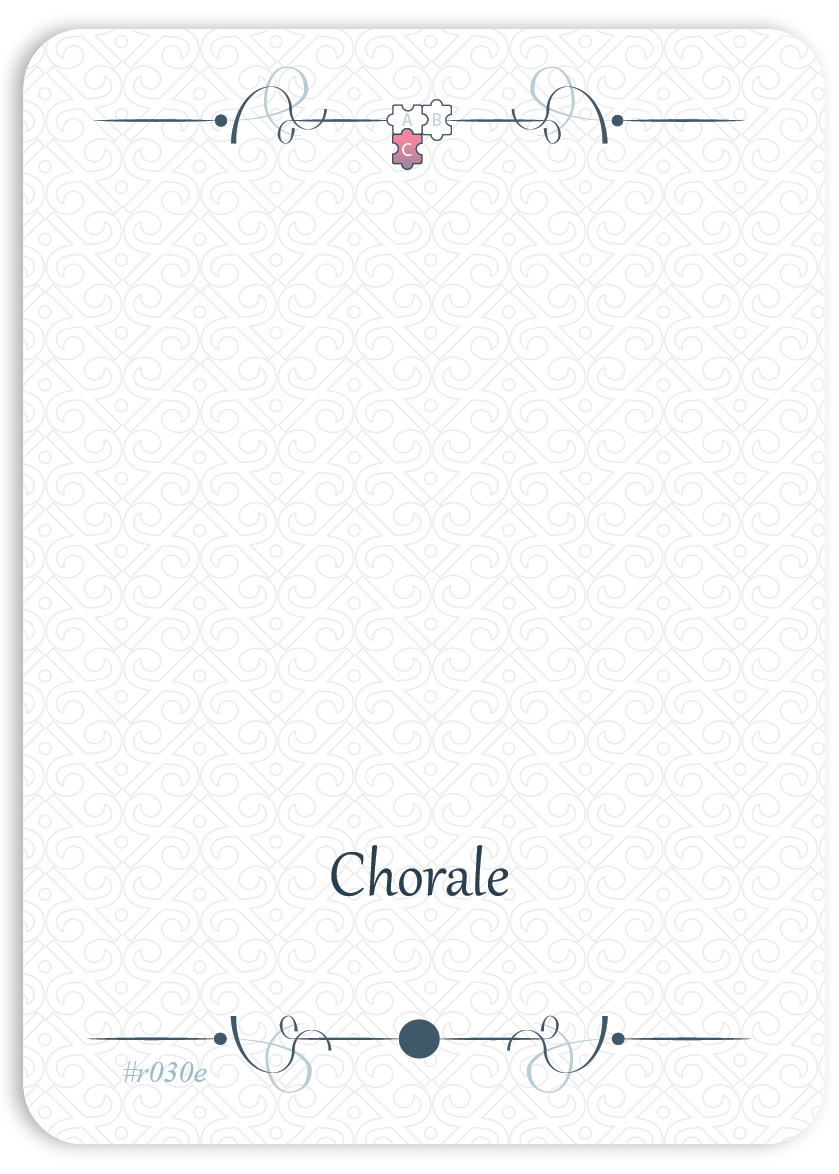
Chorale
step 2 /3 | card 18 /25 | 32/54
A chorale is a musical composition that first appeared in the 16th century, written to be sung in several voices (often four). Depending on the chorale, the writing may be homorhythmic (all four voices singing in the same rhythm) or polyrhythmic (each voice singing with different rhythms). The most emblematic chorales come from the works of J.S. Bach (1685–1750).
In this exercise, you should play all the harmonies homorhythmically (all the notes sounding at the same time, resulting in a sequence of chords) and memorize the fragment you are studying as if it were a chorale. This will help you internalize both the hand positions on the keyboard and the harmonic colors.
-
Free the wrist, elbow, and collarbone
step 2 /3 | card 19 /25 | 33/54
Check that your joints move freely and that your muscle tone is not excessive.
To release the muscles between your head and shoulders (the trapezius muscles), gently lower your shoulders and turn your head to the left, then to the right, twice.
Next, make small circular movements to check the mobility of your shoulder blades and collarbones.
Finally, make sure your elbows and wrists can move freely without resistance.
-
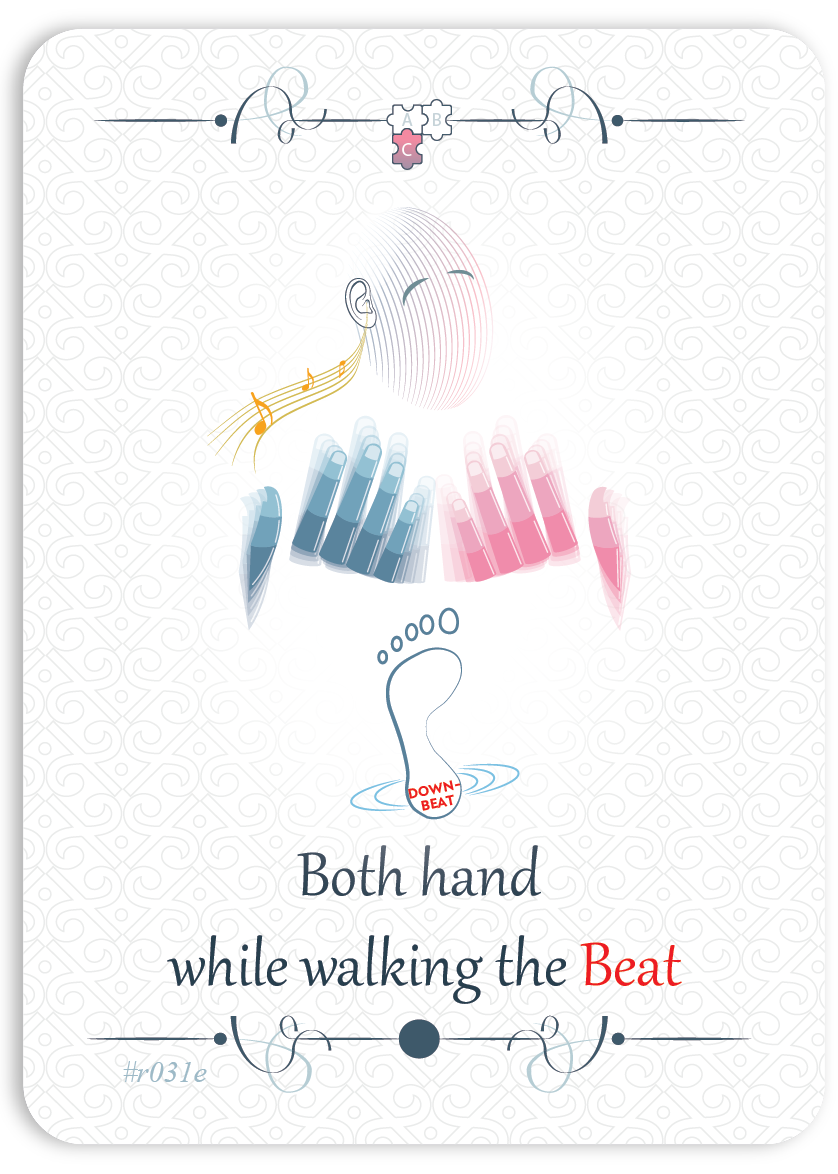
Both hands while walking the Beat
step 2 /3 | card 20 /25 | 34/54
Now play all the notes with both hands together while “walking the pulse.”
Walking the pulse means lifting your feet alternately (one, then the other) so that each foot leaves the ground completely and returns to the floor exactly in sync with the note being played and sung.
-
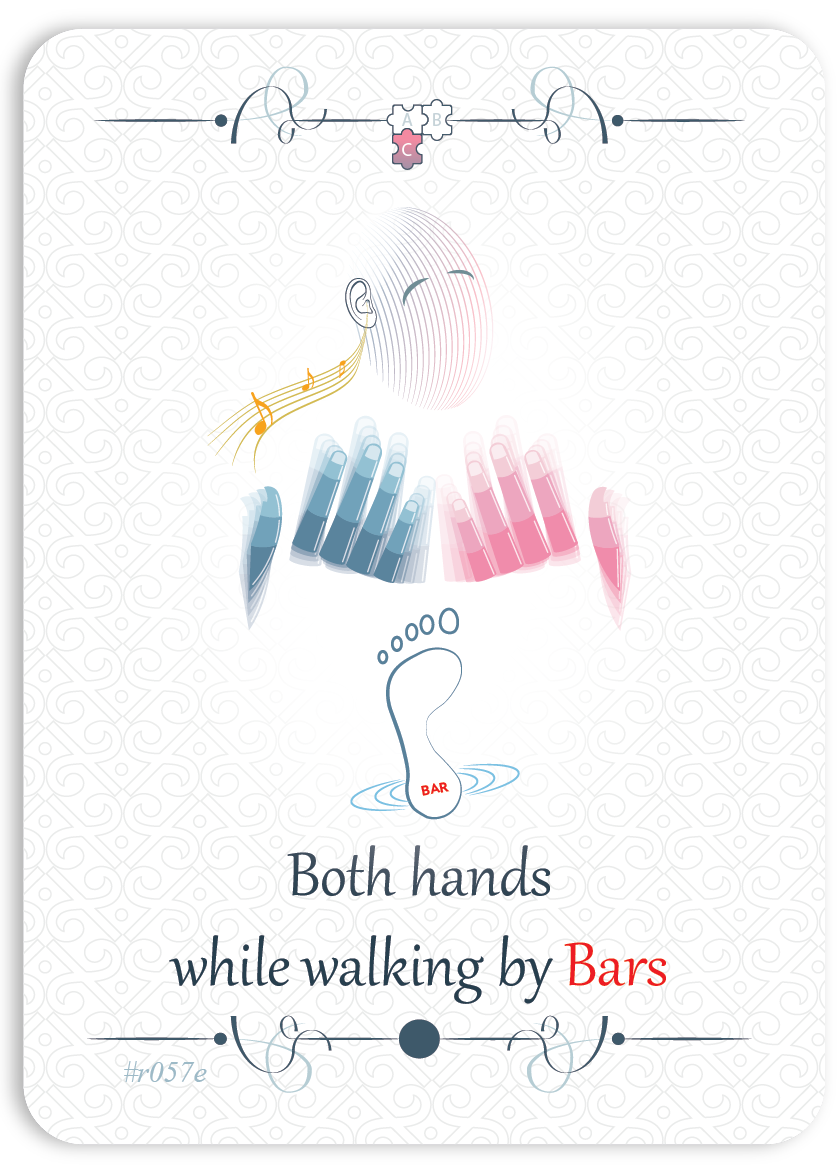
Walk the pulse with the measure
step 2 /3 | card 21 /25 | 35/54
Play with both hands together while “walking” only on the first beat of each measure.
-
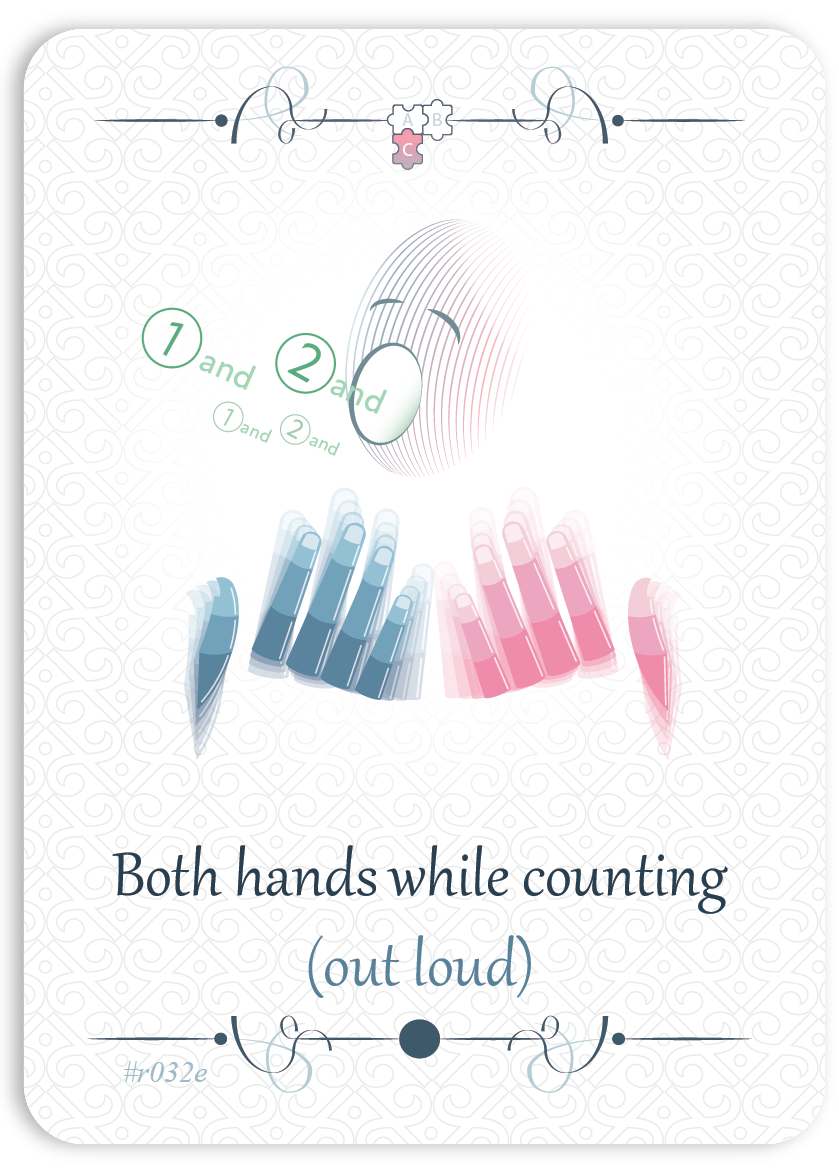
Both hands while counting the beats
step 2 /3 | card 22 /25 | 36/54
Play all the notes with both hands together while counting aloud. You may continue “walking” if you wish.
-
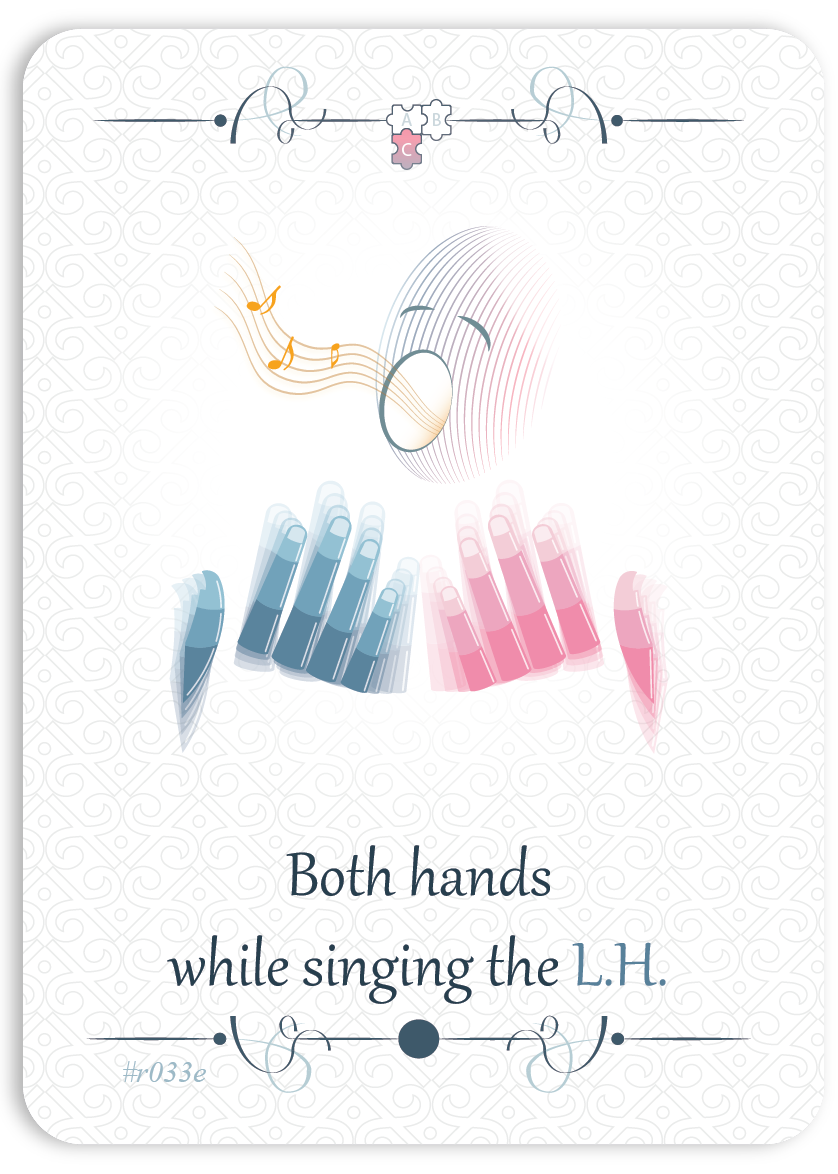
Both hands while singing the left hand
step 2 /3 | card 23 /25 | 37/54
Play with both hands together while singing the left-hand part.
-
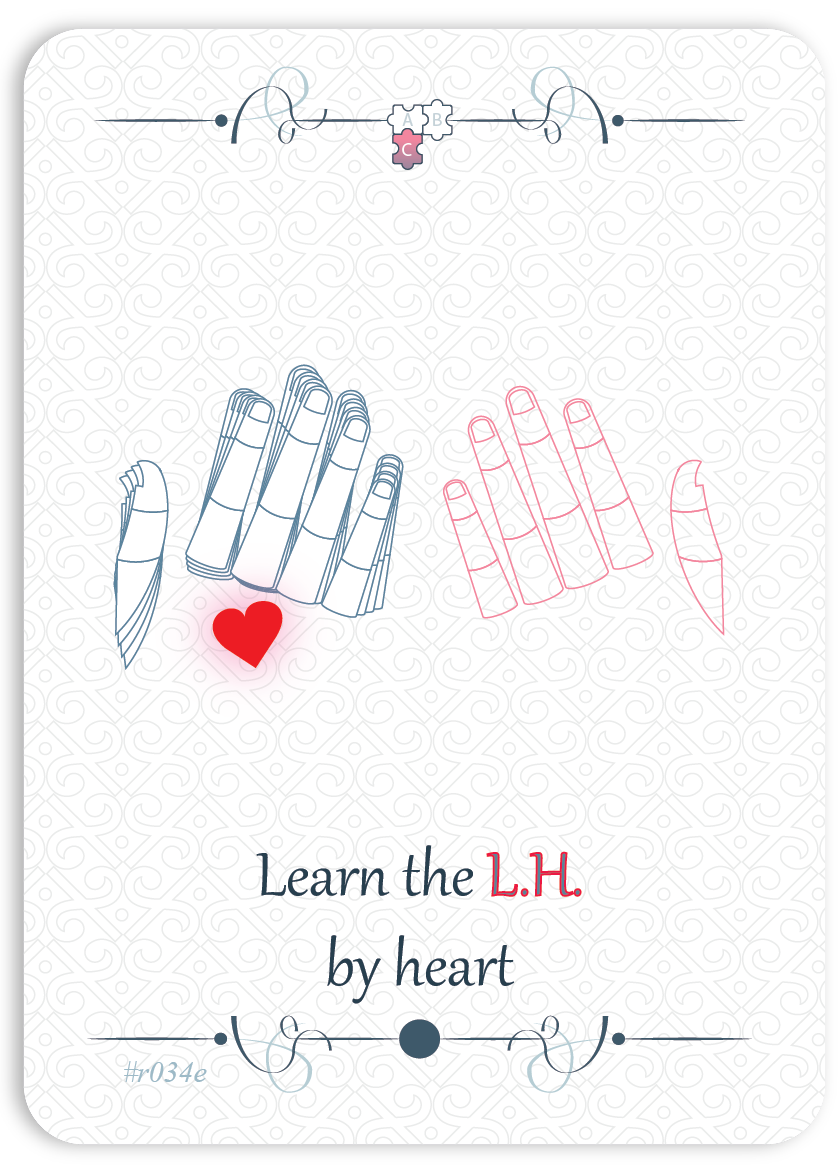
Learn the left hand by heart
step 2 /3 | card 24 /25 | 38/54
The left hand is often responsible for the “harmonic rhythm” (the frequency of harmonic changes).
It is important to learn it by heart fairly early when working on a new piece. Approach it as if it were a piece in its own right—perhaps a slightly unusual one. Enjoy that strangeness as part of the piece’s unique charm.
-
Both hands with the pedal
step 2 /3 | card 25 /25 | 39/54
Now it’s time to try your section with the pedal. Rely on the “harmonic rhythm” (the frequency of harmonic changes) you identified earlier to plan a coherent pedaling scheme.
Here are some general pedaling guidelines to adapt to each situation:
-
Each new harmony should be accompanied by a new pedal, so the harmonies do not blur into each other.
-
Avoid using the pedal during chromatic passages.
-
Adjust the pedal by ear, varying the depth of your foot according to what you hear.
-
Vary the pedal without necessarily pressing it all the way down.
-
Make sure the pedal is fully released each time, without noise, while keeping your foot in contact with it.
-
-
Take a short break
Well done! You have completed the 2nd step.
Before moving on, take a short break, because after a period of learning, our brain needs time to “digest” the information. Use this moment to have a glass of water, stretch, or simply look out the window.
-
Step III
20 minutes
Building on the skills we have acquired, this final step helps us complete the learning of a chosen fragment and cement the information more deeply.
This stage includes 15 cards:
Posture
Micro-groupings
Playing on the lid
Detailing the articulations
Detailing the dynamics
Detailing the sound layers
Conducting while humming from memory again
Playing in your head – imagining the performance without the piano
With eyes closed
Deciding on the final tempo
Metronome
Hands together while counting the measures
Working on any tempo changes
Recalling the sound image
Record yourself / Listen
-
Posture
step 3 /3 | card 01 /15 | 40/54
Before placing your hands on the keyboard, make sure you are seated in a way that allows a comfortable and optimal posture for playing the piano.
Here are some tips to follow:
- Choose a stool that is firm enough (but not too hard) so your pelvis is well supported. Avoid sitting in a chair or on a sofa.
- Adjust the height of the stool and its distance from the piano so that your elbows are open at an angle of 100° to 120°.
- Imagine that the white keys extend infinitely behind you, forming a plane. Then place your elbows on this imaginary plane.
- In your mind, visualize a horizontal division of your stool and sit on the half closest to the instrument.
- Make sure your feet touch the floor. If not, use a pedal riser or a support such as a wooden box to fill the gap.
- Maintain a connection with the floor so you can stand up at any time.
- Orient your head so that it “leads” you toward the ceiling.
- Be mindful of the space between the piano and your torso. To better sense it, imagine you are holding a large ball.
-
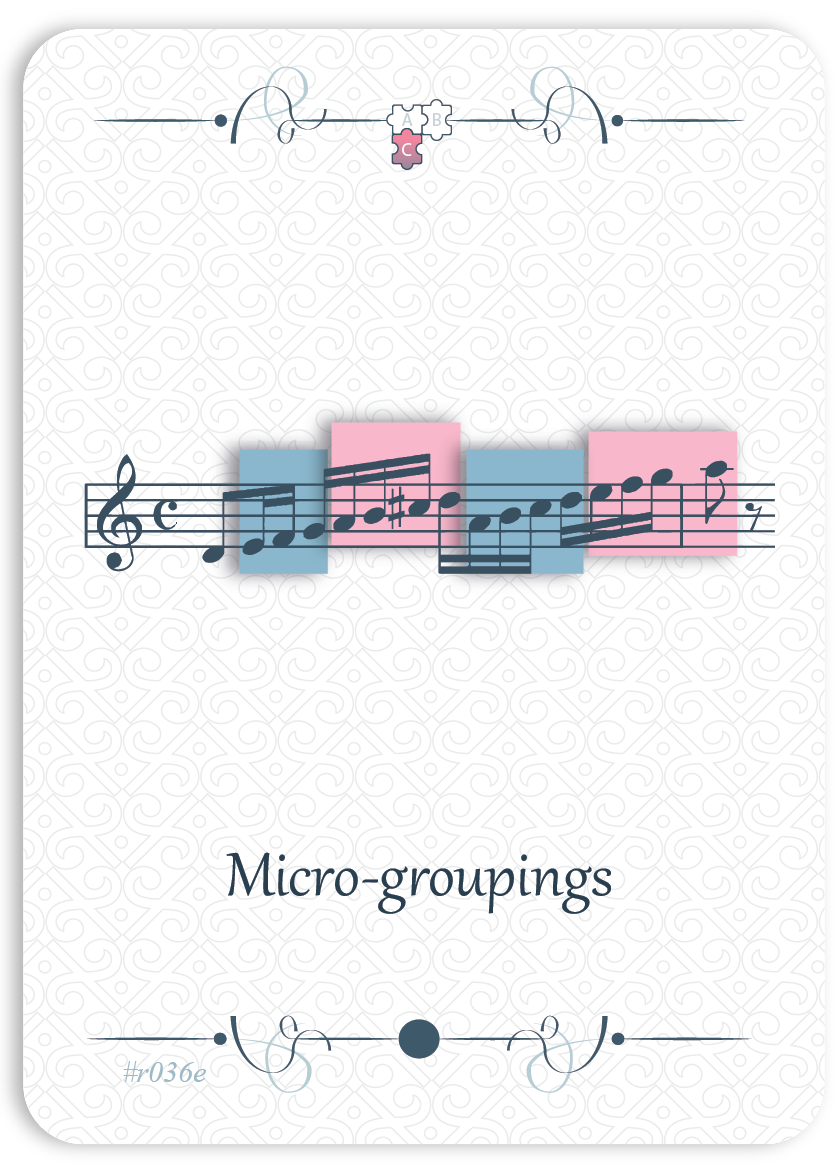
Micro-groupings
step 3 /3 | card 02 /15 | 41/54
Chunking the notes
To chunk – breaking into pieces
Just as in verbal speech, musical phrasing is organized into sentences made up of words with several syllables. We will call these words “chunks.” Within each measure, divide the musical line into small groups of 2, 3, or 4 notes (no more). Play these “chunks,” pausing on the last note of each group.
Then, link them together smoothly while keeping the separation between groups in your mind—but of course, do not make it audible. You will likely notice that the entire section becomes clearer both for you and for your listener.
This exercise is particularly helpful for clarifying fast passages.
______________
The example on the card: MOZART – Piano Sonata No. 17, K.545; 1st movement (measure 9) -
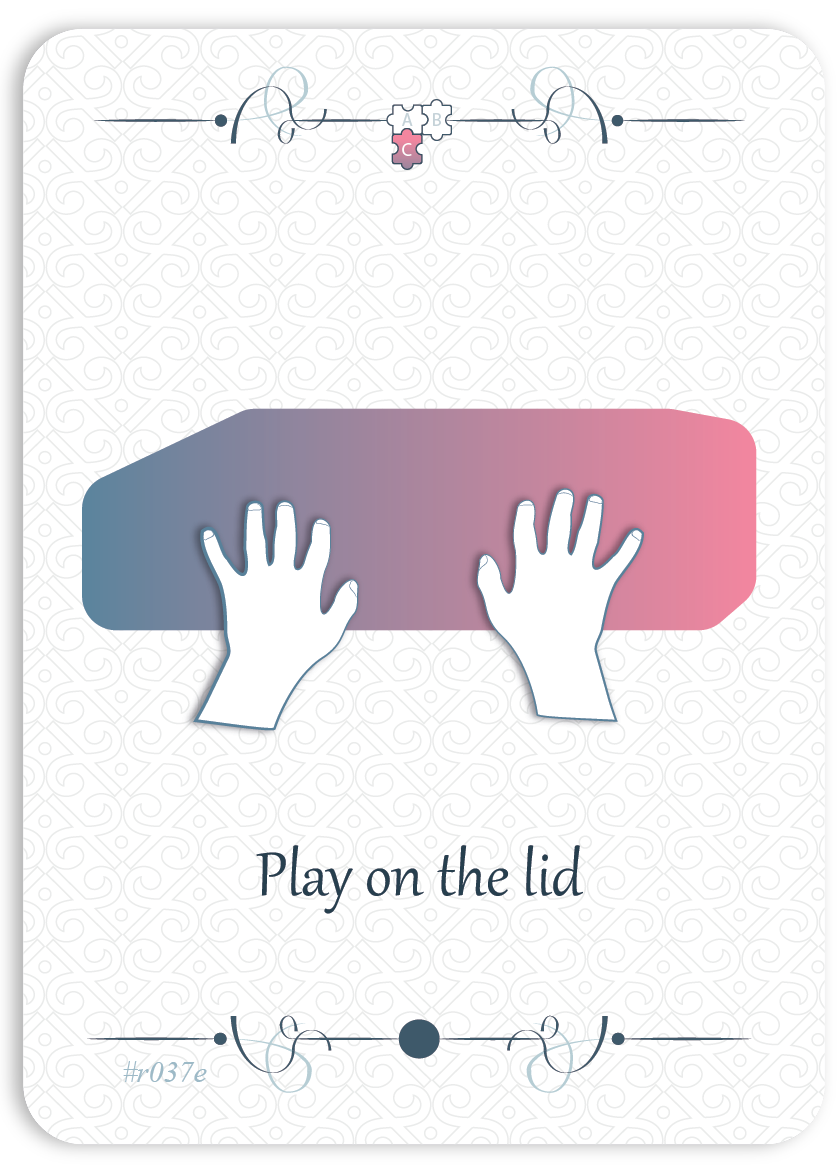
Play on the lid
step 3 /3 | card 03 /15 | 42/54
When done with care, this exercise offers many benefits. It helps you memorize your fingerings, become aware of the pads of your fingers, and learn the distances between the keys. It also trains you to imagine the sounds and immerse yourself in the “sound image” of your piece, thereby creating a “narrative.”
For this exercise, play your piece on the piano lid or on a table while singing, and then without singing.
It is true that this exercise can be challenging and unsettling. At first, you may forget your fingerings or find it difficult to “play.” Don’t worry—this requires an unusual kind of mental dissociation. If it happens, calmly return to your score and focus on a small section of the fragment you are working on. Play it slowly on the piano, then repeat it on the lid.
The passages that feel most challenging on the lid are often the very ones that need the most refinement.
-
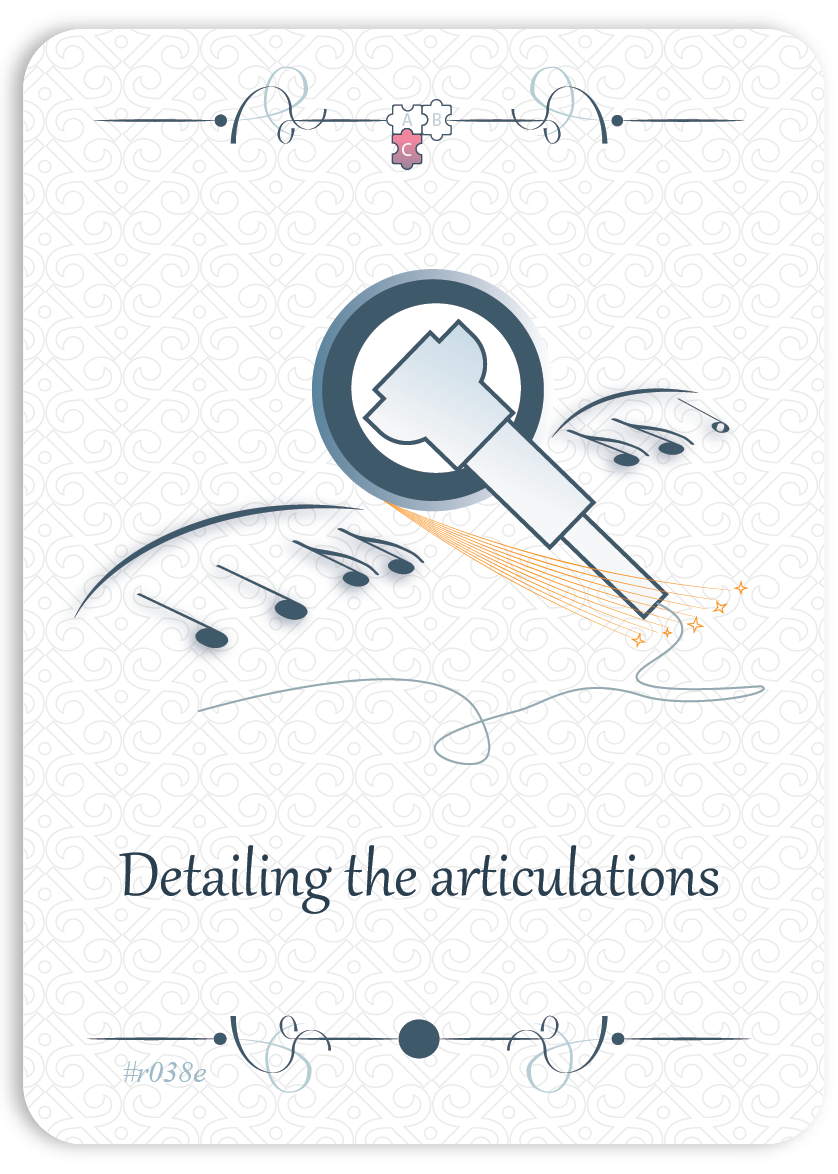
Detailing the articulations
step 3 /3 | card 04 /15 | 43/54
Now focus on the details of the articulations1.
______________
1 Articulations : legato, staccato, tenuto. These are the different ways of connecting or separating notes: linking them smoothly (legato), detaching them (staccato), or paying special attention to how each note is held and released (tenuto). -
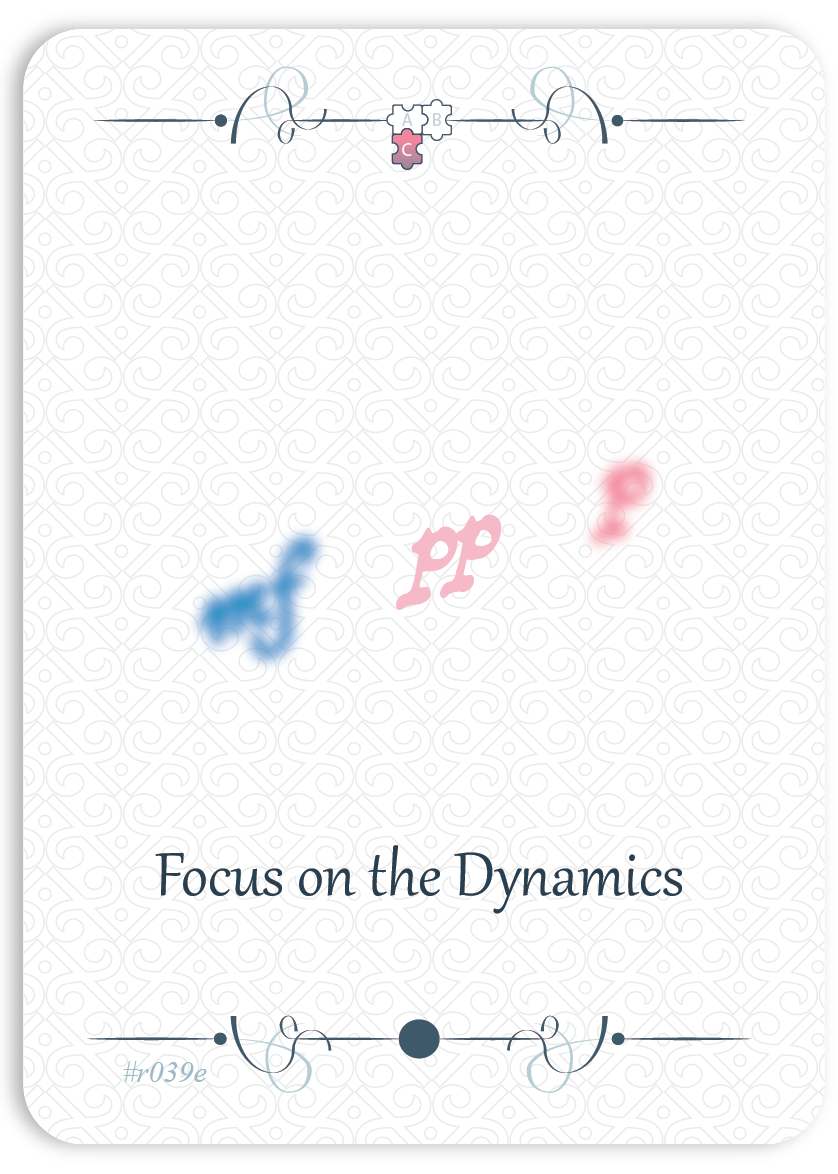
Focus on the Dynamics
step 3 /3 | card 05 /15 | 44/54
Now focus on the details of the dynamics1.
Download the dynamics sheet
______________
1 Dynamics : piano, forte, mezzo-forte, pianissimo. Also called dynamics, these are the different ways of expressing musical content—for example, softly (piano), powerfully (forte), or gently (pianissimo), etc. -
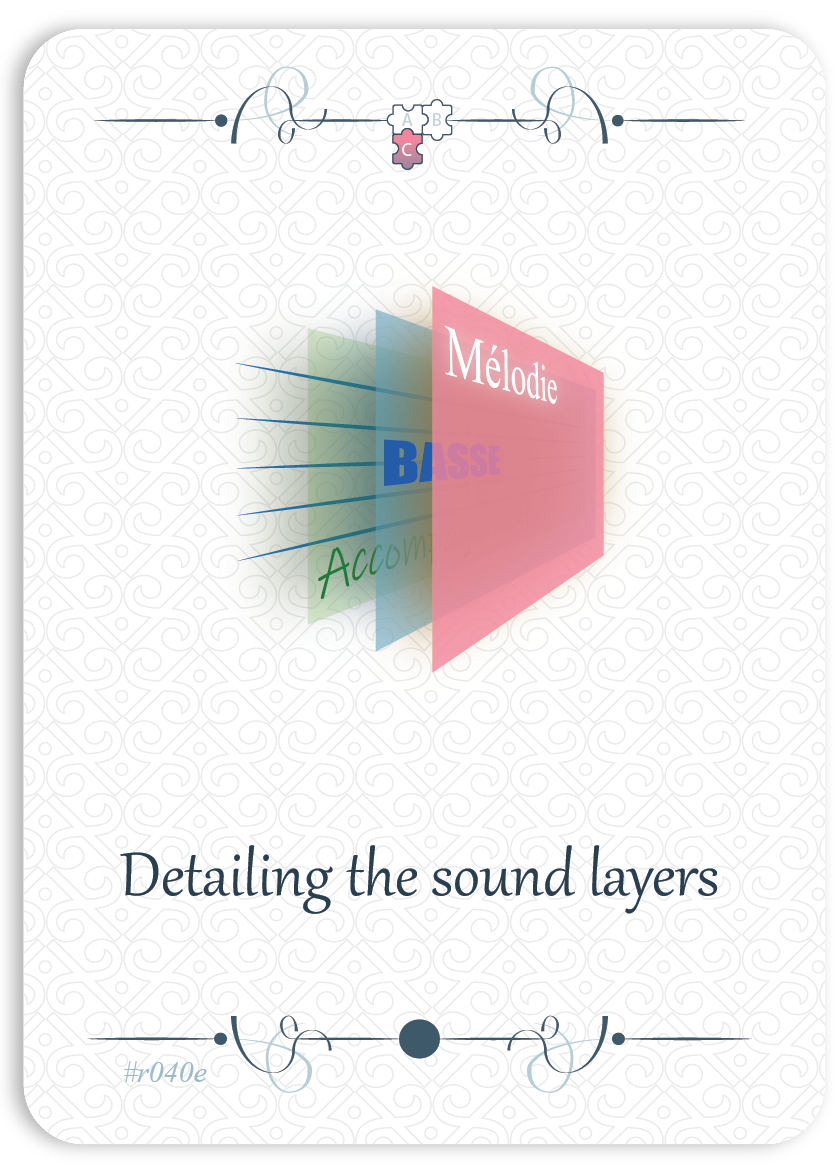
Detailing the sound layers
step 3 /3 | card 06 /15 | 45/54
In most pieces, you can distinguish three layers (or planes) of sound: the melody, the bass, and the accompaniment. It is important to establish a hierarchy among them. Here are their characteristics:
1. The melody is a musical line with a strong identity, easily recognizable and often simple to sing and memorize. It usually lies in the upper register and is generally the highest line (except in rare cases where it appears in the middle or lower register). The melody should be placed in the “foreground” of the musical texture, meaning it should be clearly more prominent than the other layers.
However, it is essential to remain attentive to the hierarchies between notes within this voice. Even though it is dominant, this does not mean that every note should be played with the same dynamic.2. The bass serves as the foundation for the harmonies. It occupies the “second plane” of sound—less important than the melody but more important than the accompaniment. It is the lowest line.
3. The accompaniment is the least prominent layer, situated between the extremes.
However, it provides harmonic resonance, supporting and adding depth to the melody and bass.
It is important to note that this layer can, of course, be subdivided into multiple sub-layers, which would be imagined as played by different orchestral instruments.Example1:
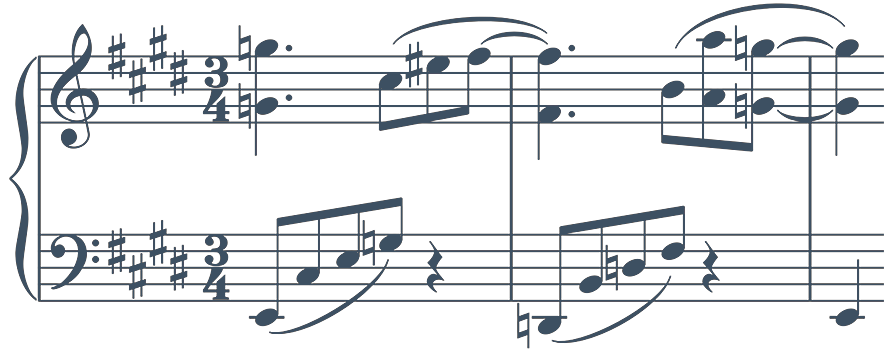
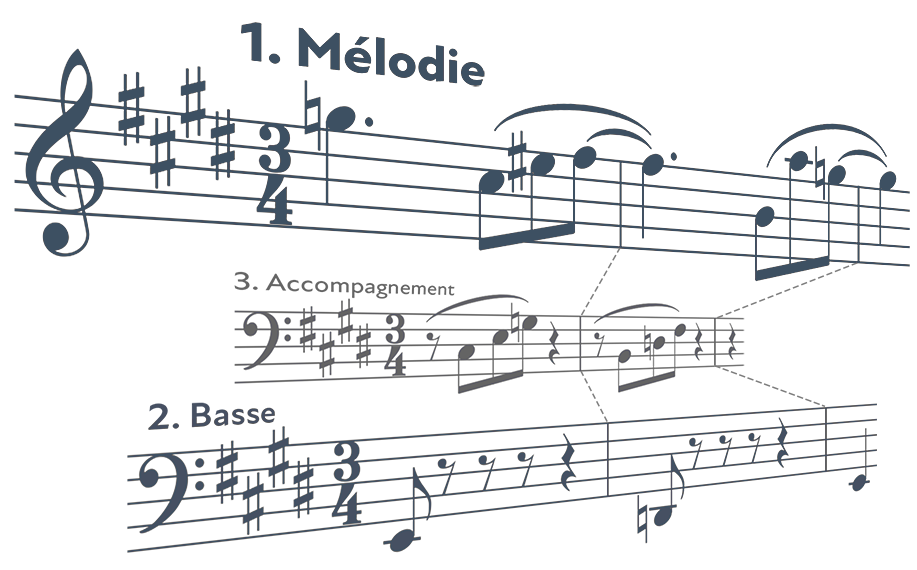
BRAHMS – Intermezzo Op. 119 No. 2
(measures 56–57)______________
1 Here, we clearly distinguish the three layers. You may have noticed that some notes disappear when making this distinction. These notes would belong to a fourth layer, which we chose not to mention so as not to complicate the concept of sound layers. -
Conducting while humming from memory again
step 3 /3 | card 07 /15 | 46/54
Now that you know the melody, sing it from memory while keeping the beat or conducting, without looking at the score. Repeat this several times.
Download the sheets:
-
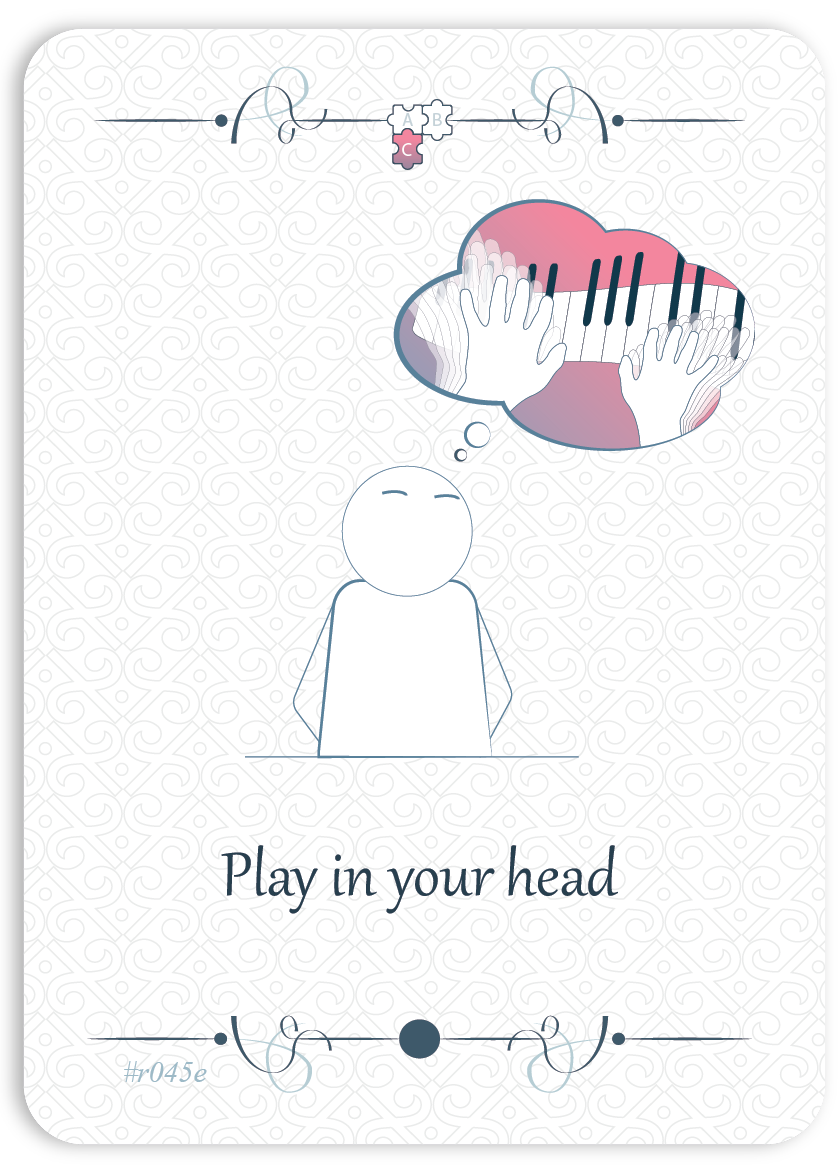
Play in your head
step 3 /3 | card 08 /15 | 47/54
Now project yourself more specifically into performing the piece. Close your eyes and imagine that you are actually playing.
-
Picture how your torso and arms will move when you play “for real”
Visualize how you will place your fingers on the keys
Imagine the distances between different intervals
Envision all the movements you will make to perform the piece. Run through this “choreography” in your mind while keeping a steady pulse. Start slowly and in small sections, then gradually increase the tempo while connecting the sections smoothly.
-
-
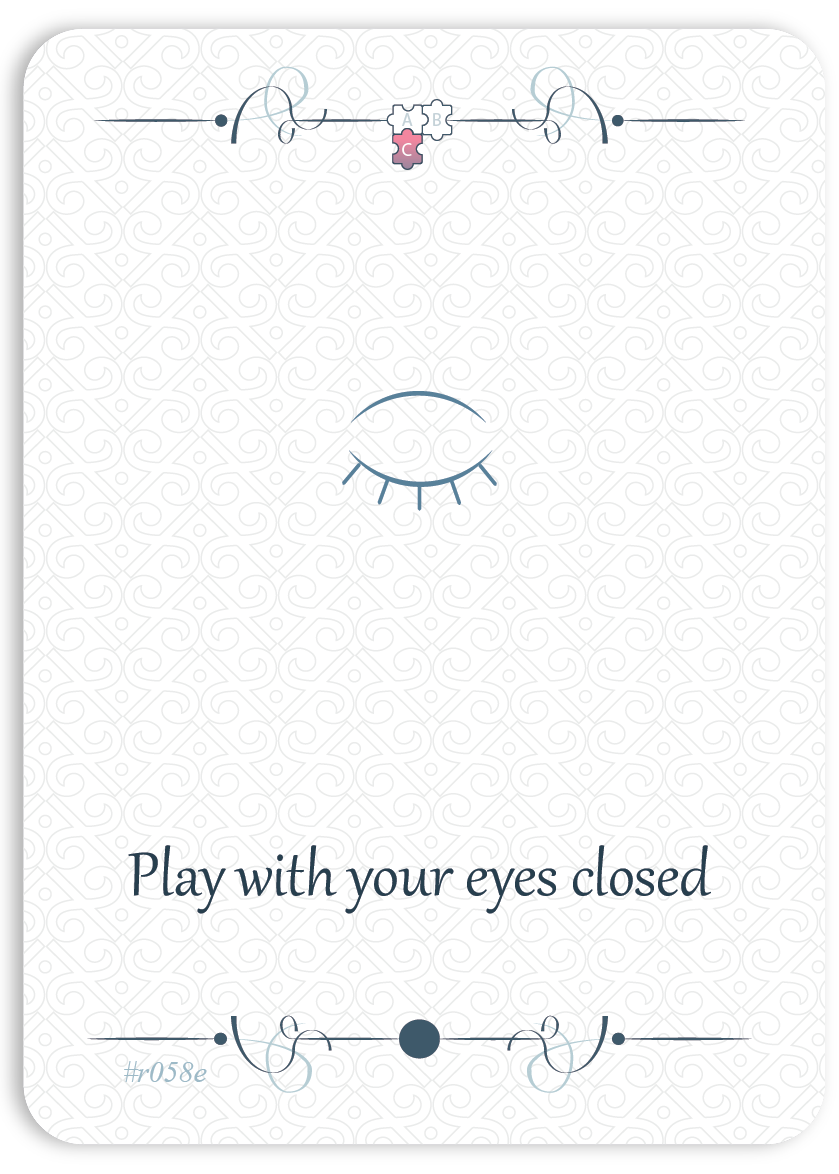
Play with eyes closed
step 3 /3 | card 09 /15 | 48/54
To refine your mental representation and create a smooth transition to playing at the keyboard, play the fragment several times with your eyes closed.
-
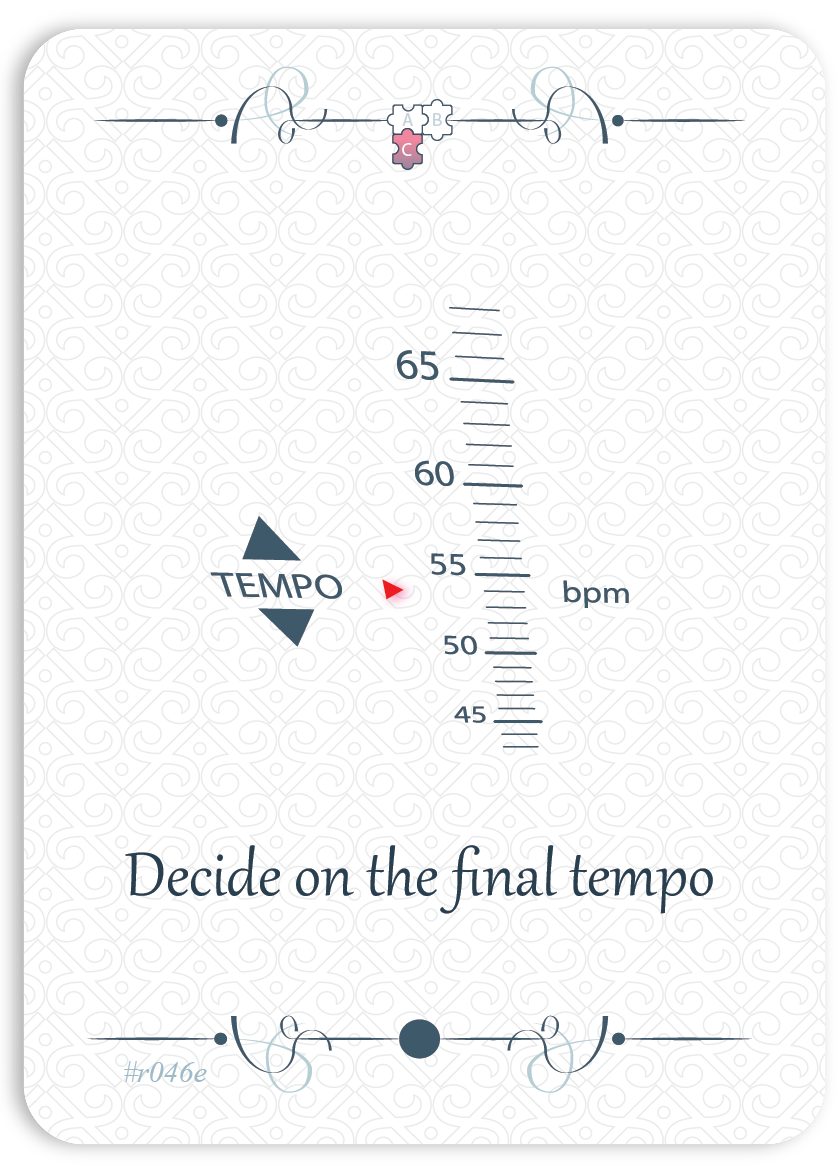
Decide on the final tempo
step 3 /3 | card 10 /15 | 49/54
Deciding on the final tempo
At this stage, ask yourself: “What exact tempo will I play this fragment1 at in performance?”
We suggest comparing your understanding of the composer’s tempo marking with 3 to 5 interpretations by your favorite pianists. Then, notate this tempo on your score in bpm2.
Keep in mind that this value may evolve over time.
______________
1 This fragment, of course, is part of a larger section where the tempo will generally be consistent, with minor variations.2 bpm = beats per minute.
-
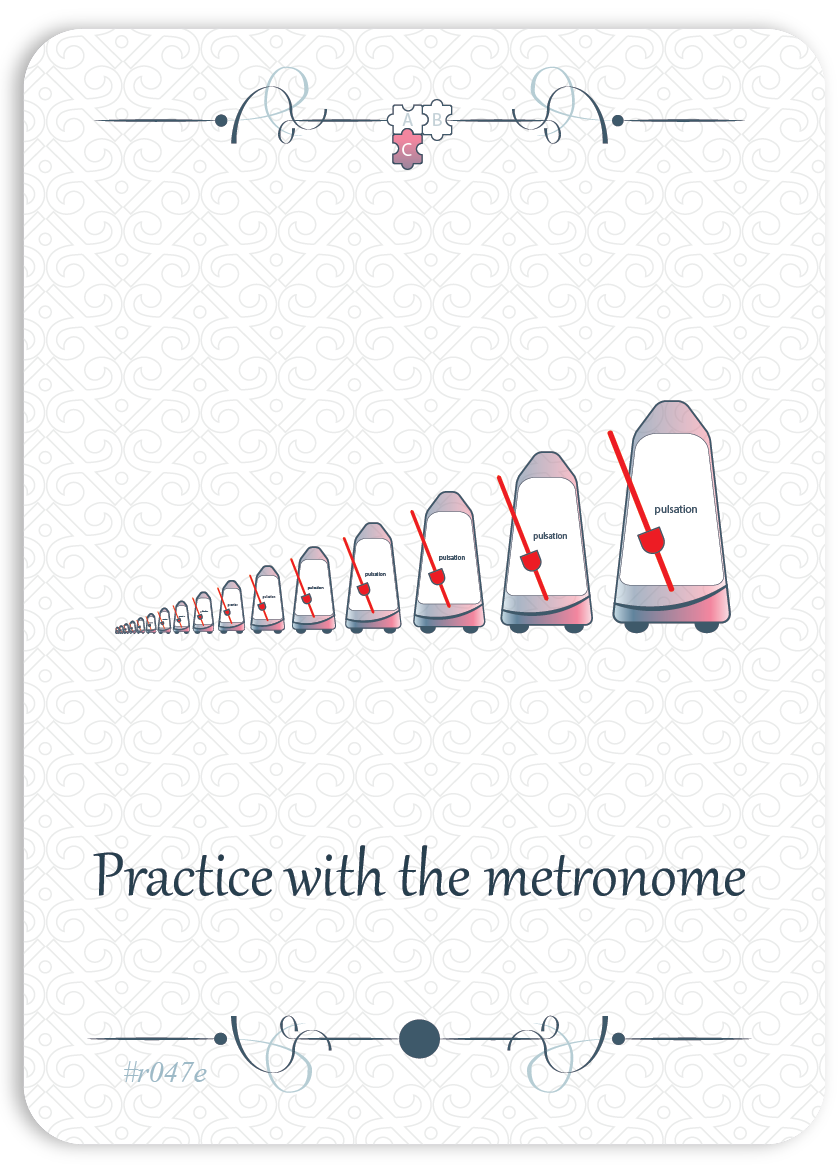
Practice with the metronome
step 3 /3 | card 11 /15 | 50/54
Working with the metronome
Rhythmic precision gives a special dimension to our musical expression. When working on musical timing, using a metronome can be very helpful, as it indicates the pulse and highlights any deviations from it. It is crucial to study a fragment with extreme metric accuracy, in order to later allow for expressive flexibility and explore a “living time.”
It is important to note that the metronome is merely a tool to establish and check the rhythm. It should never be considered a guarantee of expressive playing or an end in itself.
-
Metronome increments: Set the metronome to a tempo in which you feel comfortable. Play the passage several times. Then increase the tempo by 3 to 5 bpm (beats per minute) and replay the same passage. Continue increasing the metronome speed until you reach the desired tempo, then gradually return to the slower tempo you started with.
BEETHOVEN – Sonata Op. 14 No. 1; 1st movement (measures 1–2) -
Off-beat metronome: The metronome now clicks on the weak beats. This exercise may seem challenging at first, but once mastered, it will greatly enhance your sense of pulse.
-
Measure metronome: The metronome now marks the entire measure (very slow beat).
-
-
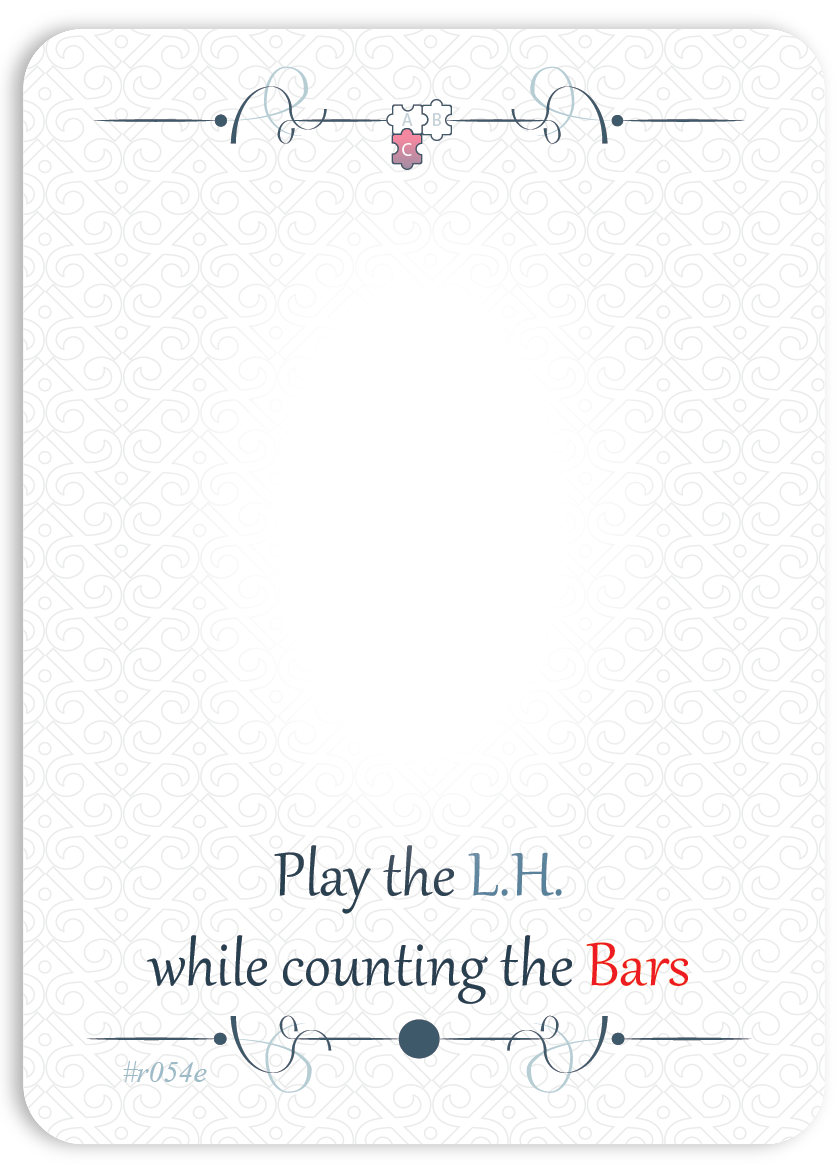
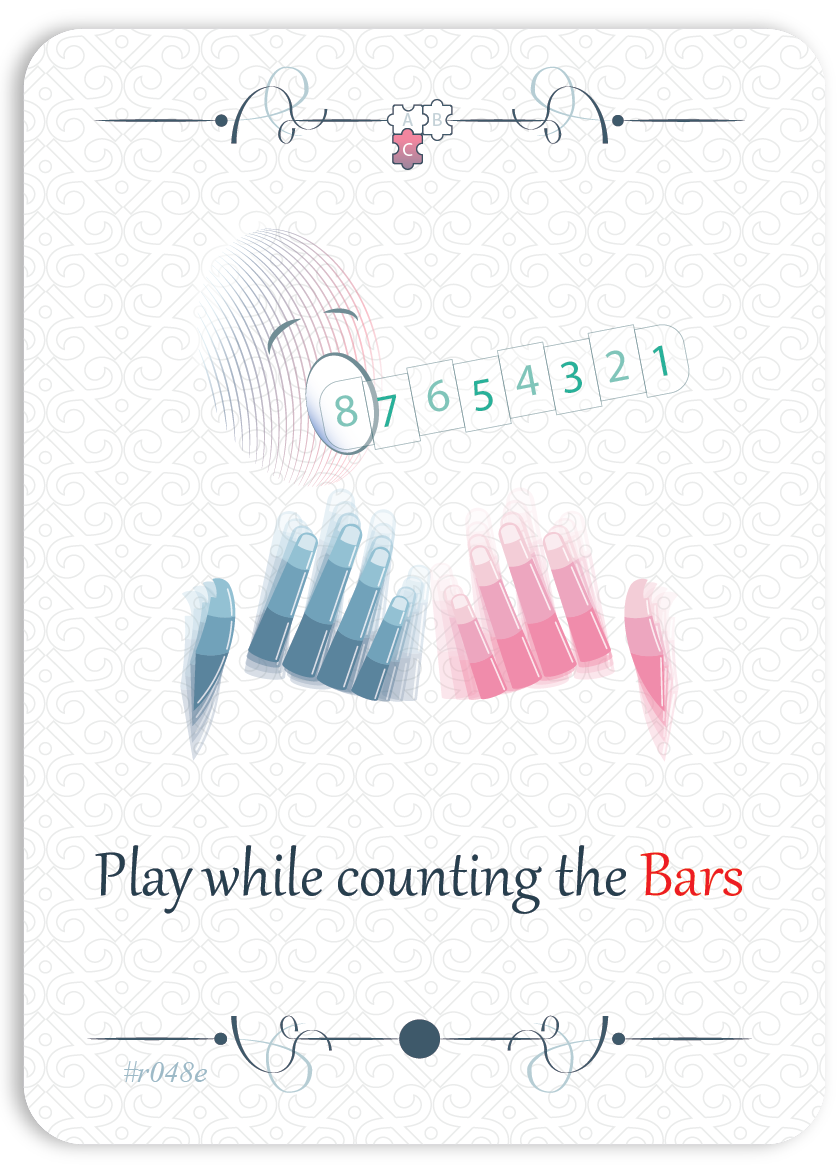
Play while counting the Bars
step 3 /3 | card 12 /15 | 51/54
To develop a sense of unity within the section, play hands together while counting aloud the number of each measure you previously marked.
-
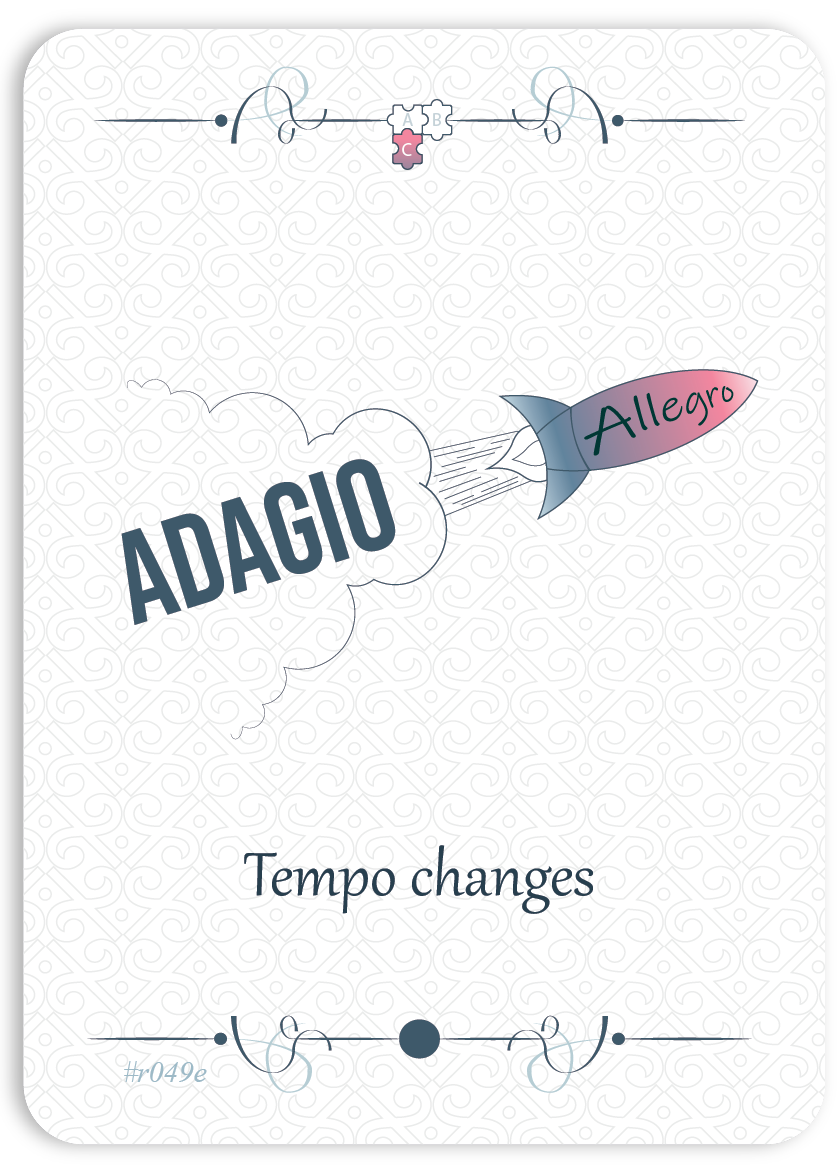
Tempo changes
step 3 /3 | card 13 /15 | 52/54
At this stage, detail all the tempo variations indicated by the composer.
-
Recall the sound image
step 3 /3 | card 14 /15 | 53/54
Remember the “story” you want to convey with this fragment.
-
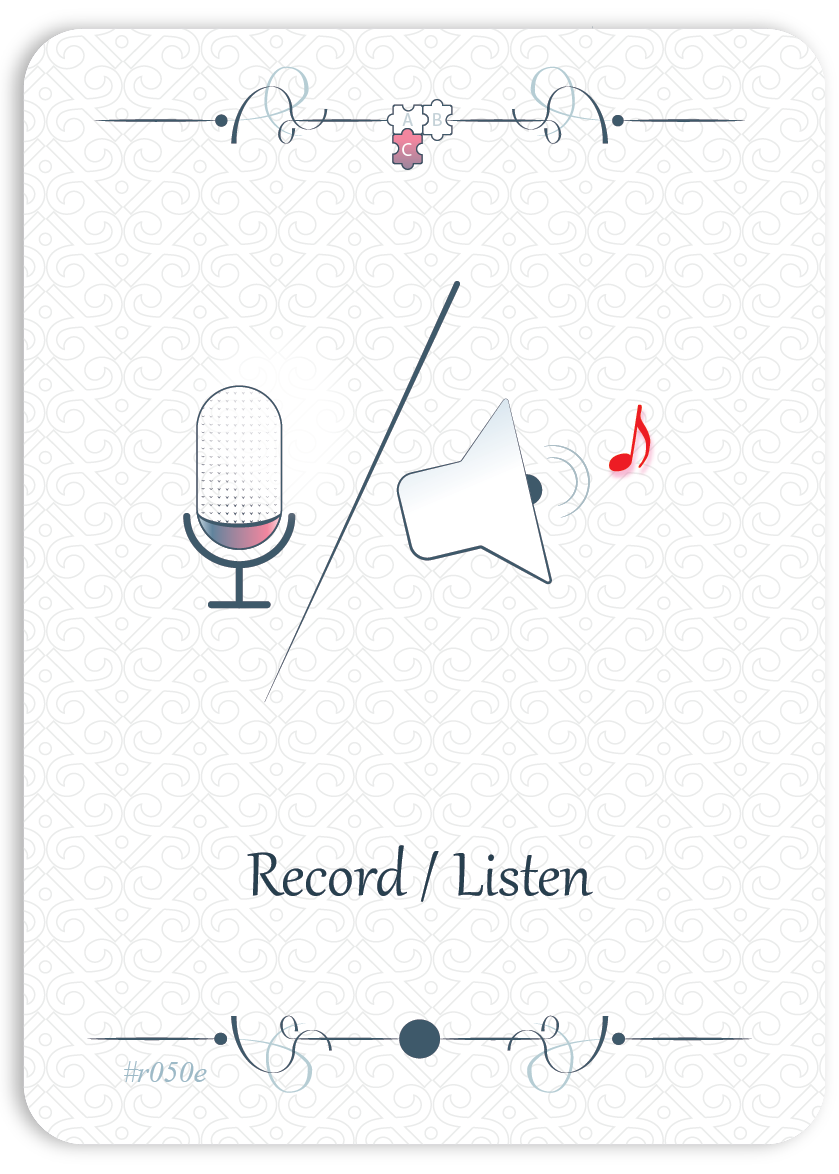
Record / Listen
step 3 /3 | card 15 /15 | 54/54
When we play, it is not always possible to fully perceive the entire sound image we are creating. This is why recording can serve as an objective reference.
Record yourself and consider the following questions:
- Is the “artistic intention” you wish to convey to the audience potentially perceptible?
- What discrepancies do you notice between what you planned and what you hear in the recording?
Make a second recording, correcting the issues you noticed.
-
Well Done! 🎉
Congratulations! You have completed this session!
Congratulations on completing remarkable work that will soon bear fruit.
Now take a short break, as after a period of learning, our brain needs time to “digest” the information. Take the opportunity to have a glass of water, stretch, or simply gaze out the window.
Then, move on to another fragment of your piece and return later to the one you just learned. This approach will help you better integrate the information and skills you have acquired.